Approval workflows
Approval workflows are about formally accepting changes made to a document and ensuring that the content meets certain quality criteria.
Breeze brings Confluence page approvals to a whole new level. The workflows are simple and straightforward, yet can be configured to be very strict to fit more regulative environments, e.g. ISO 27001.
Setting up an approval workflow
Section titled “Setting up an approval workflow”Open Breeze and create a new workflow.
To set up an approval workflow, enable the Approvals section. This activates the page statuses DRAFT and IN APPROVAL and adds approval features to the workflow, which are explained below.

After deciding on the following options, click Save workflow and assign the workflow to one or multiple spaces.
Use draft status for new pages
Section titled “Use draft status for new pages”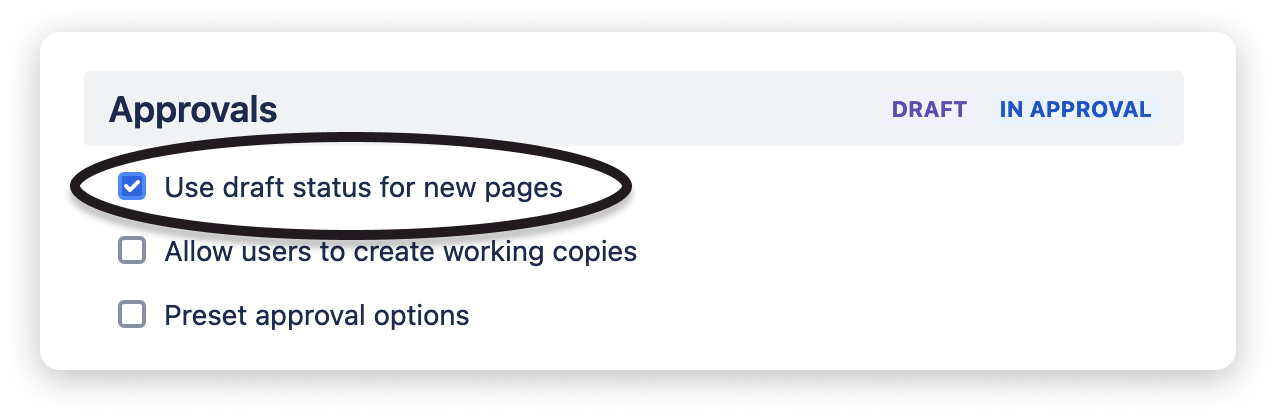
If this option is selected, newly created pages (in spaces to which the workflow is assigned) get the DRAFT status. Otherwise, newly created pages get the UP TO DATE status by default.
In both cases, the status will change to IN APPROVAL when a user starts an approval request. If the approval is accepted, the page status is set to UP TO DATE. If it is rejected, the page status is set to DRAFT.
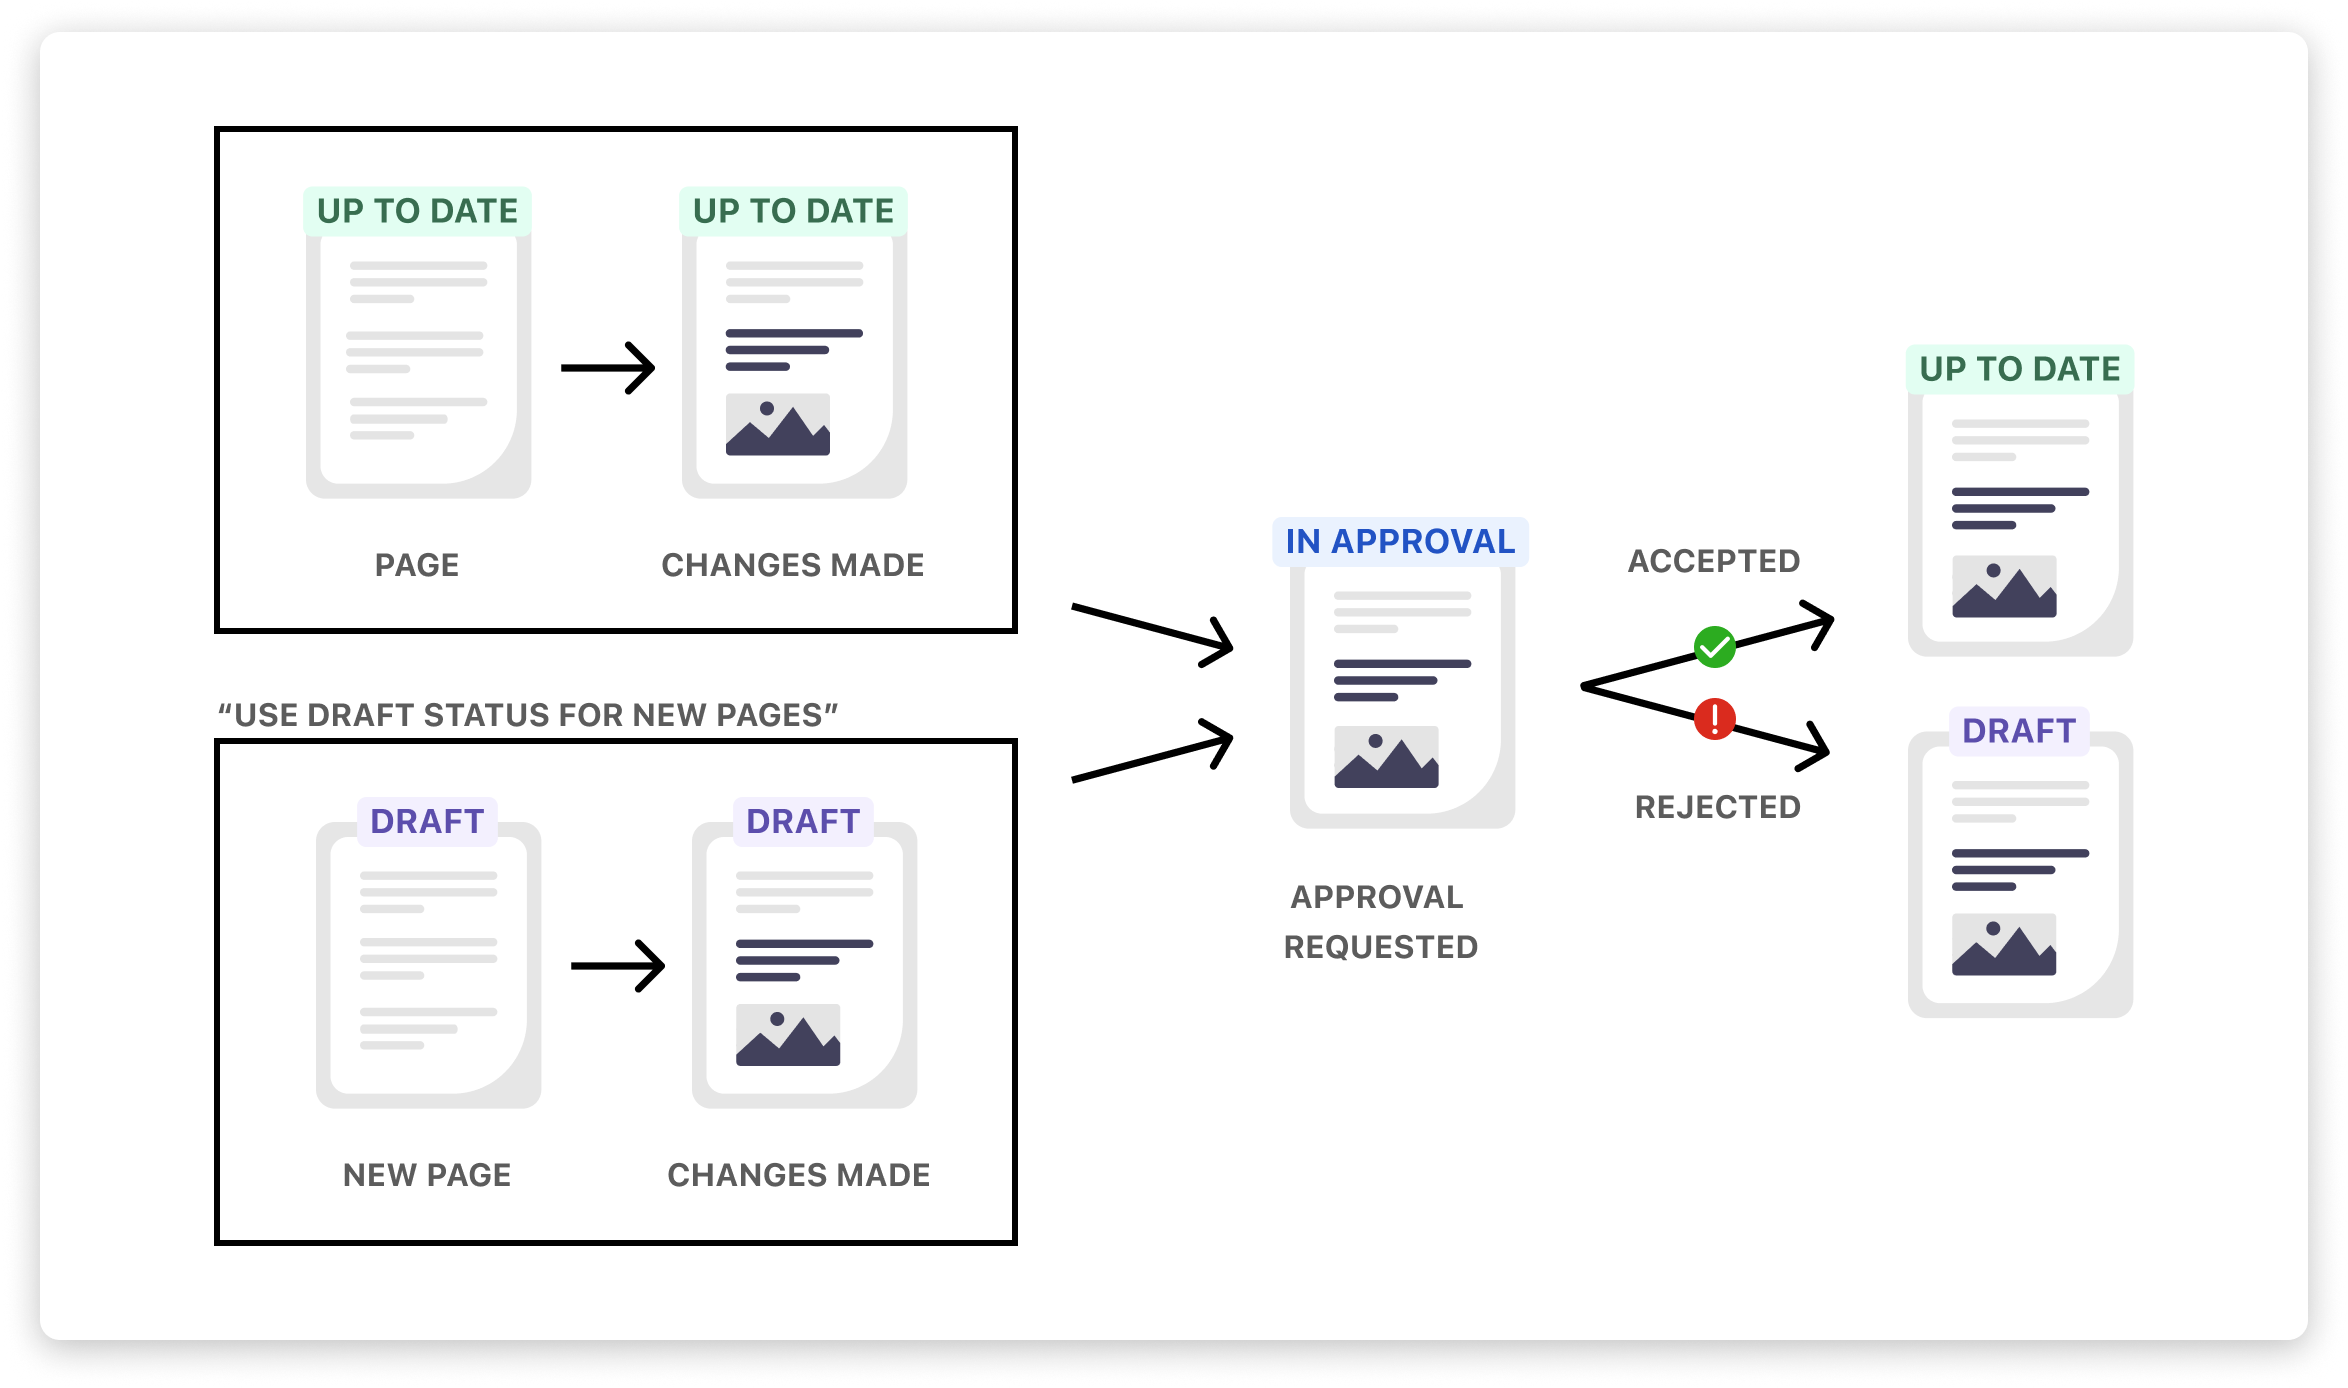
Since Confluence permits all third-party apps and users other than the creator to access an unpublished page, the standard approval workflow illustrated above requires that changes made to a page have to be published before requesting approval!
This is a significant limitation for regulated industries and use cases where companies need content to remain unchanged until an update is approved and then published. While other Confluence approval plugins cannot meet this requirement, Breeze offers an exclusive solution, explained in the following section.
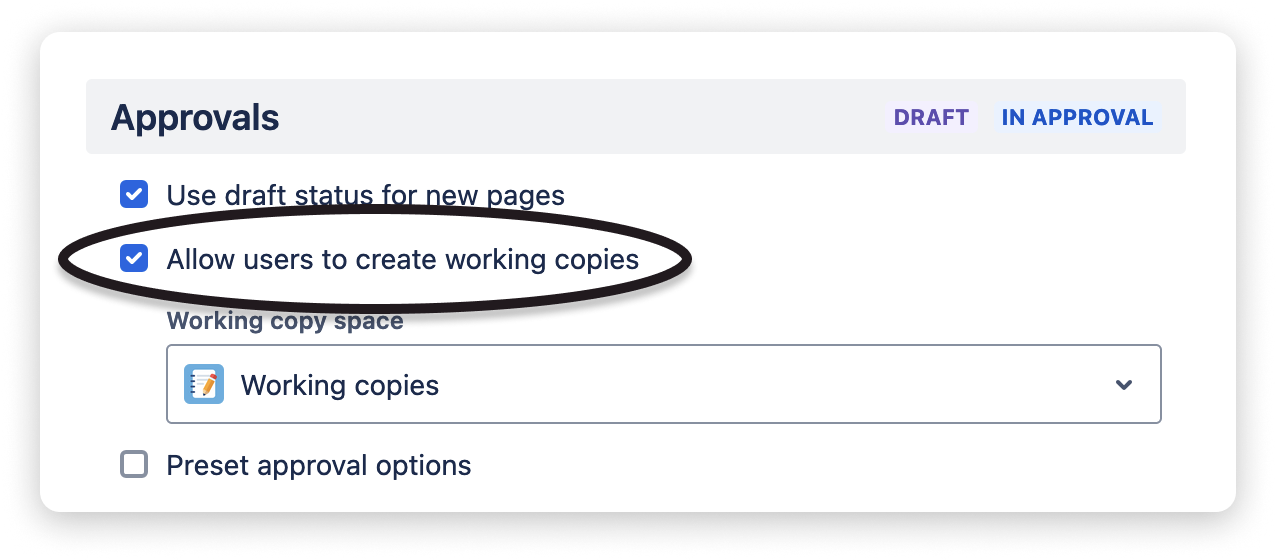
Allow users to create working copies
Section titled “Allow users to create working copies”Working copies are a powerful concept for implementing a more restrictive approval workflow (e.g. for ISO 27001). The main idea is to separate concerns between (1) the editing of pages and requesting approval for the changes, and (2) publishing these changes only after the approval is granted.
This separation of concerns is achieved by allowing users to create working copies, i.e., cloning pages into a predefined working copy space:
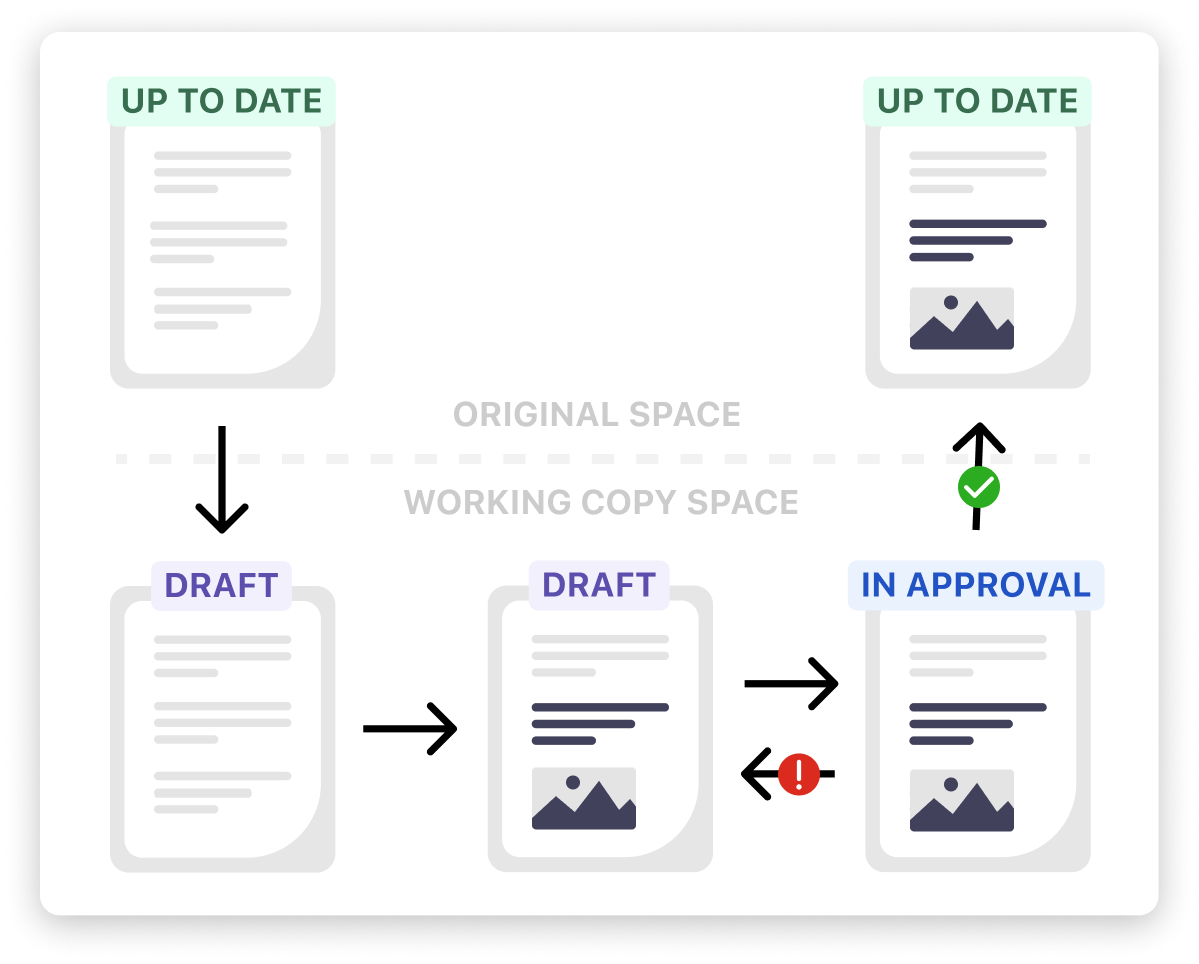
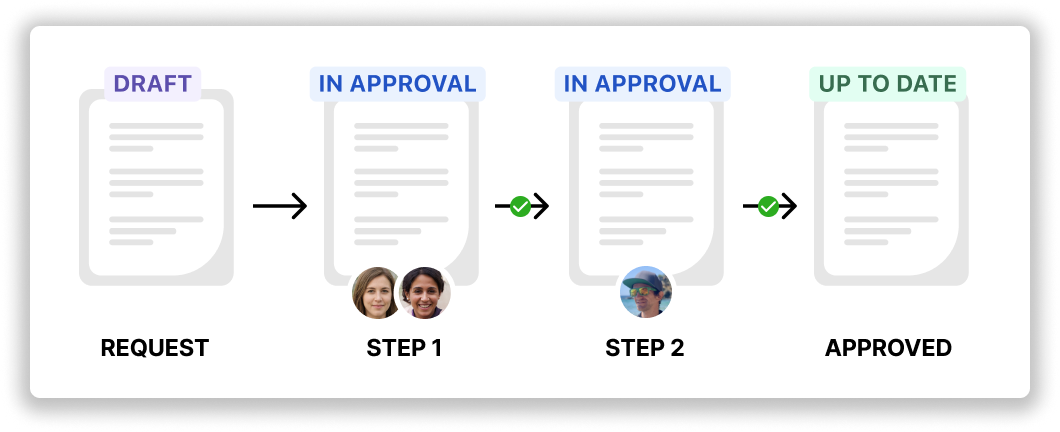
The resulting approval workflow is illustrated below. While the original page stays untouched, a working copy gets the DRAFT status and can be edited at will before requesting approval for the changes. After the approval is granted, the approver can publish the changes made in the working copy into the original page. After this, the working copy will be automatically archived (or deleted if you are on the ‘Free’ Confluence plan).
If an approval workflow is assigned to multiple spaces, you can group working copies in the working copy space to make the source spaces easier to distinguish. Enable Group working copies to place working copies into separate folders by source space.
The permissions of users taking part in this workflow can be freely configured via the Confluence space settings:
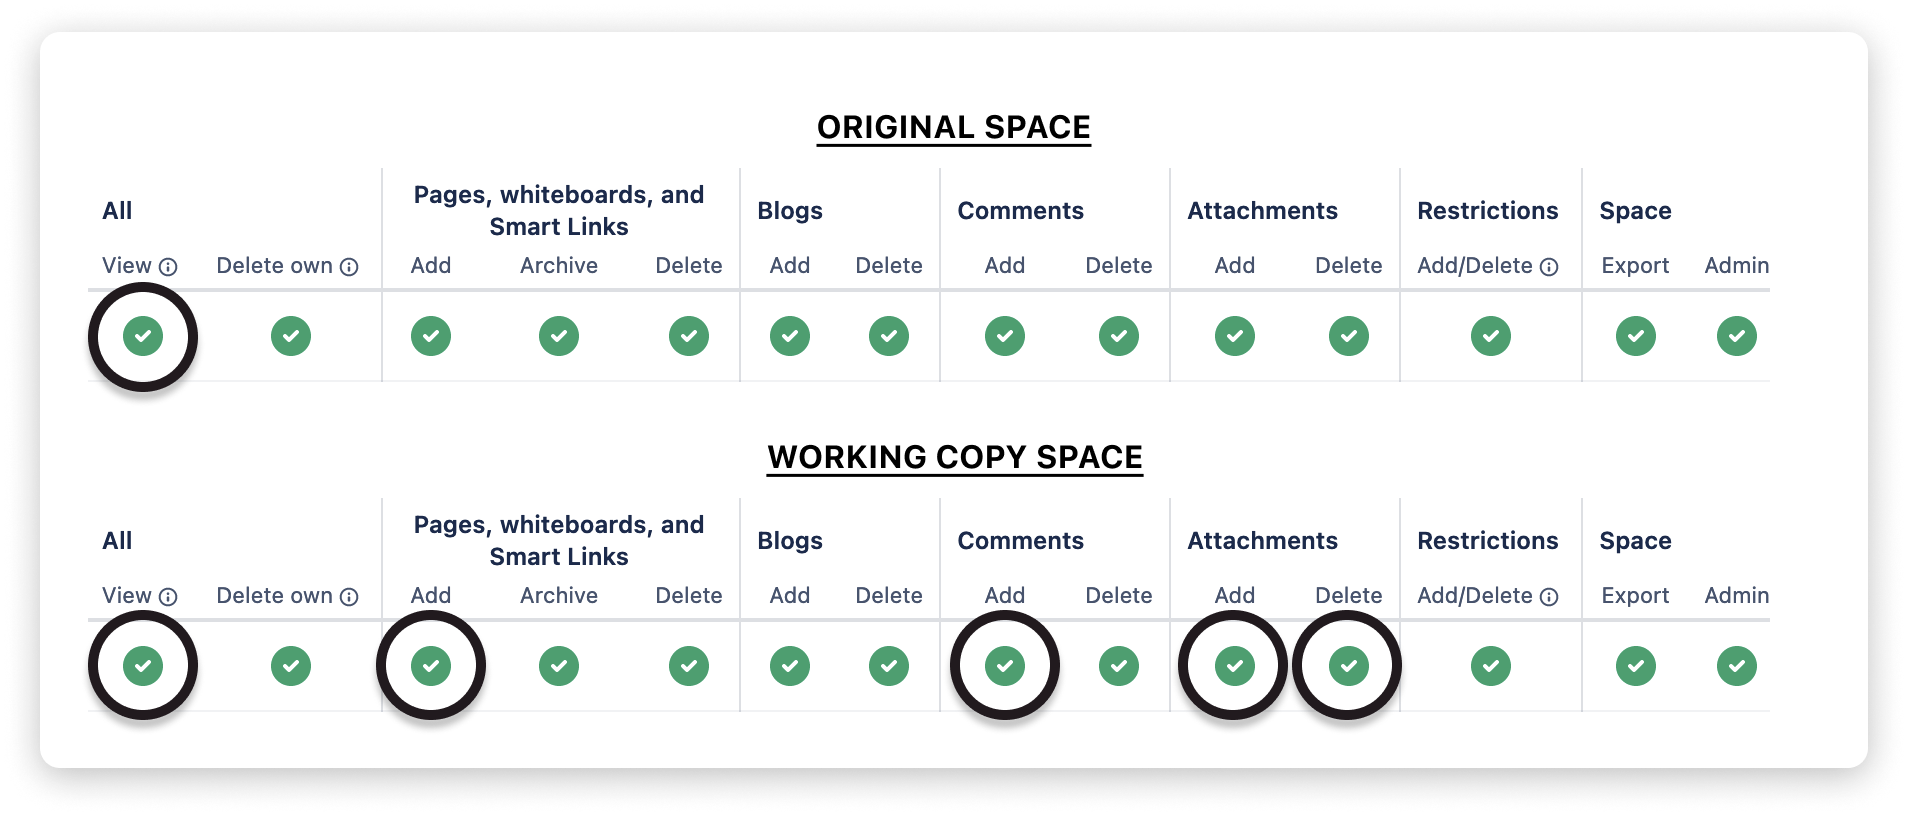
- Creating a working copy, editing its content, and requesting approval requires a user to have permission to view pages in the original space, and to add/edit pages and comments in the working copy space:
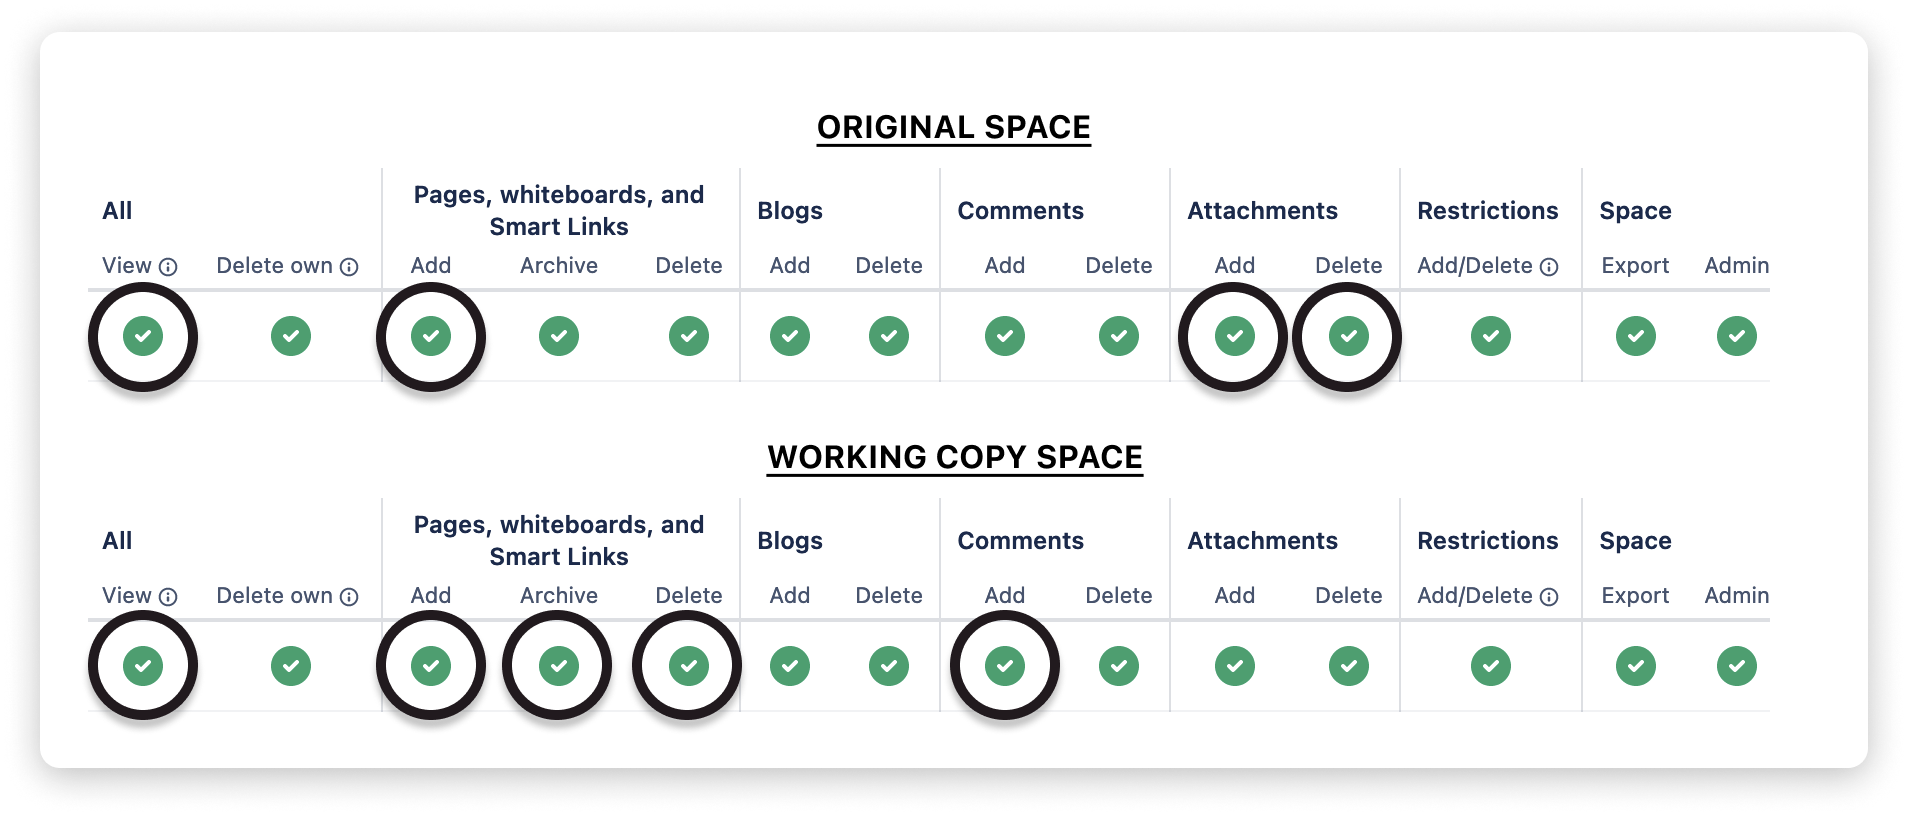
- Approving a working copy and merging its content in the original page requires a user to have permission to edit pages and attachments in the original space, and to edit/delete/archive pages and add comments in the working copy space:
As a result of individually configuring permissions for the original and working copy space, you can map a wide variety of use cases. If you have questions regarding your specific use case, please start a support request, so we can discuss the optimal setting with you.
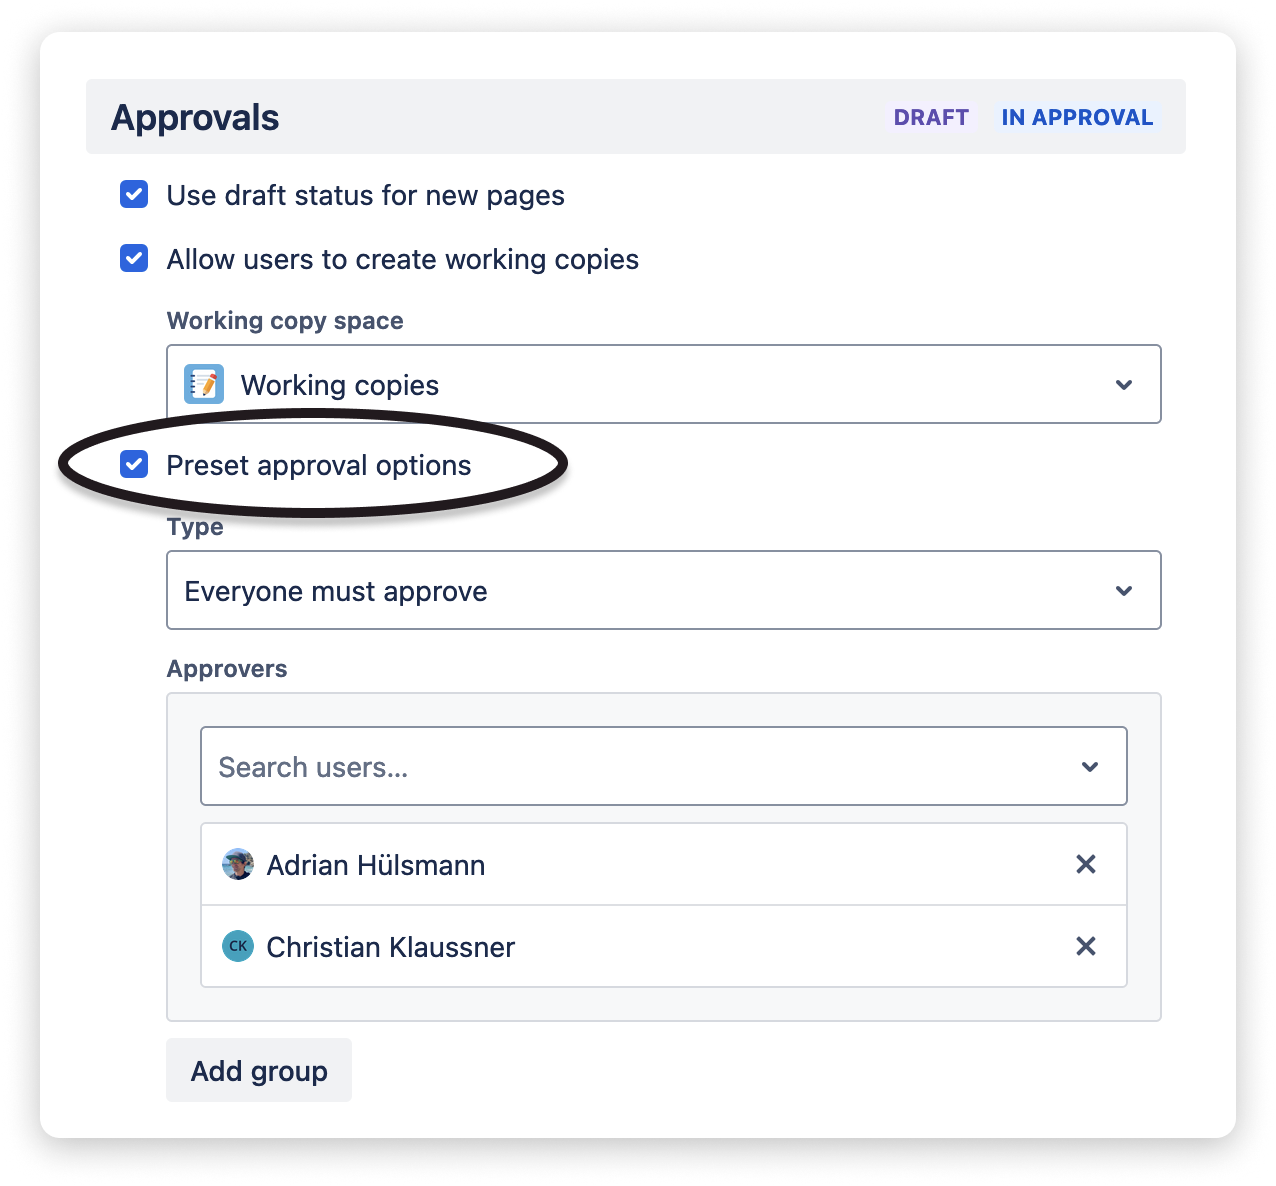
Preset approvers (for standard and multi-step approval)
Section titled “Preset approvers (for standard and multi-step approval)”This option allows the approval options of Confluence documents to be preset. You can choose between standard approval and multi-step approval, as explained in the following.
Standard approval
Section titled “Standard approval”With this preset, users requesting approval for a page cannot decide on the type and the approvers but have to use the predefined options.
To edit the approval options, click the pen icon in the approvers list. When adding approvers, you can choose an approval type from the following options:
- Everyone must approve - a page is only approved by a unanimous decision
- First response decides - the first vote of whichever approver decides
- Majority must approve - a page is approved or rejected by a majority vote
Approvers can be specific users, groups, or roles, such as the space owner or page owners.
If more than one group of approvers is added to the preset, users can decide on one of these approver groups when requesting approval for a page. As an example, in the image above, users requesting approval can choose between Molly Clark and Omar Darboe (first option), or the Confluence user group “standard-approvers” (second option).
If the preset contains only one group of approvers, the requesting user cannot select but has to use this one prepopulated group of approvers.
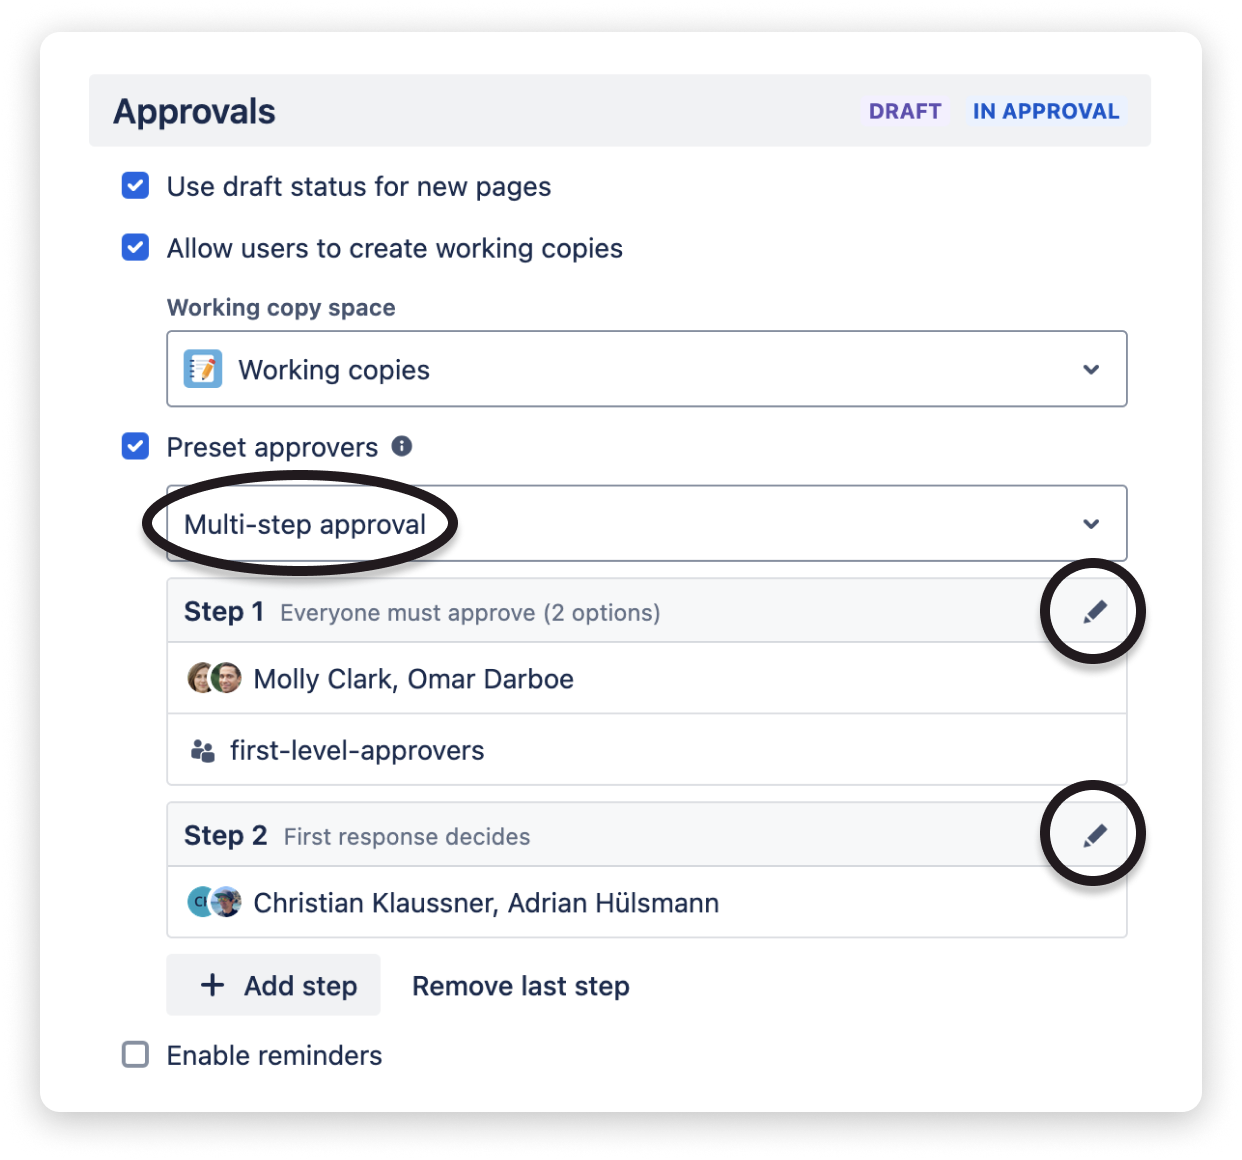
Multi-step approval
Section titled “Multi-step approval”This preset is used to approve Confluence documents in a step-like manner, whereby the approvers of each step need to accept the request to finally approve the document.
To edit the approval options of a step, click the pen icon in the approvers list.
When adding approvers, you can choose an approval type from the following options:
- Everyone must approve - a page is only approved by a unanimous decision
- First response decides - the first vote of whichever approver decides
- Majority must approve - a page is approved or rejected by a majority vote
Approvers can be specific users, groups, or roles, such as the space owner or page owners.
If more than one group of approvers is added to a step, users requesting approval can decide which approver groups to use. As an example, in the image above, users requesting approval can choose for the first step between Molly Clark and Omar Darboe (first option), or the Confluence user group “first-level-approvers” (second option).
If a step contains only one group of approvers, the requesting user cannot select but has to use this one prepopulated group of approvers. As an example, in the image above, users requesting approval cannot decide on the approvers of the second step because it only has one option and hence will always be conducted by Christian Klaussner or Adrian Hülsmann.
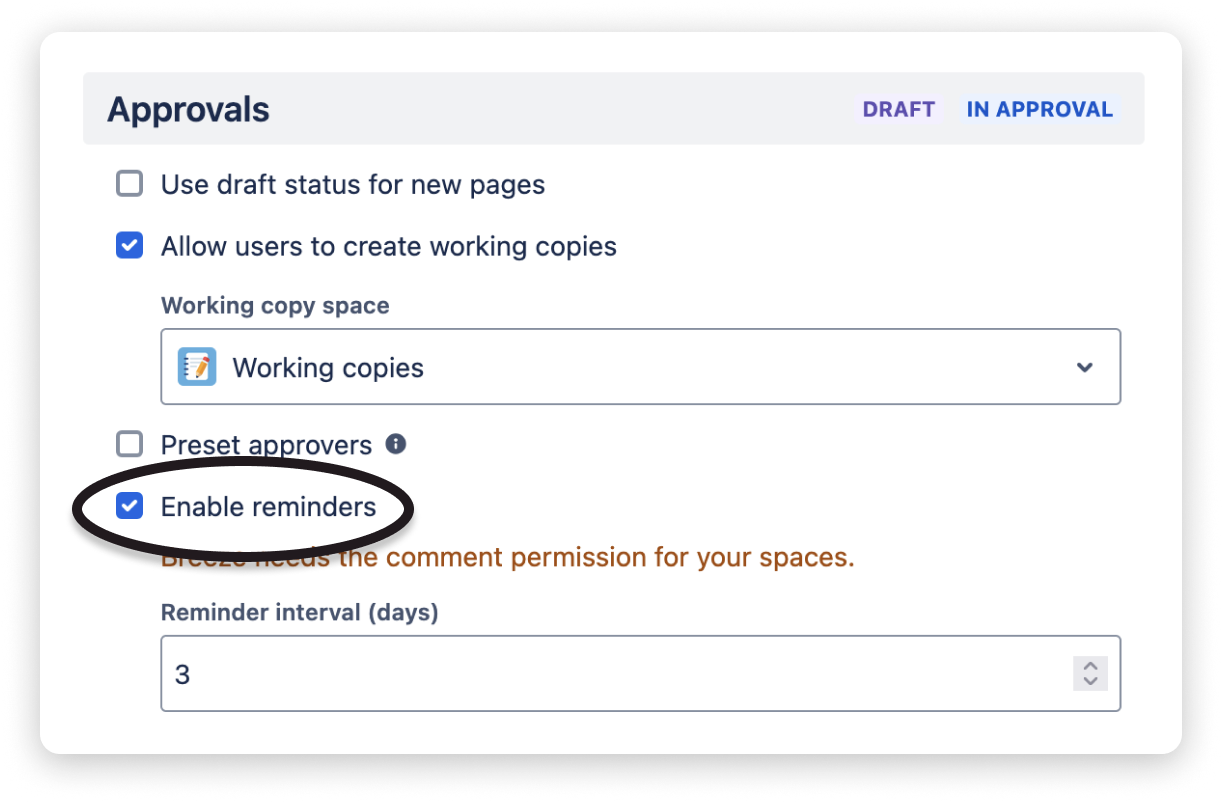
Enable reminders
Section titled “Enable reminders”If this option is selected, you can specify a reminder interval (in days) to notify approvers to take action on the approval requests.
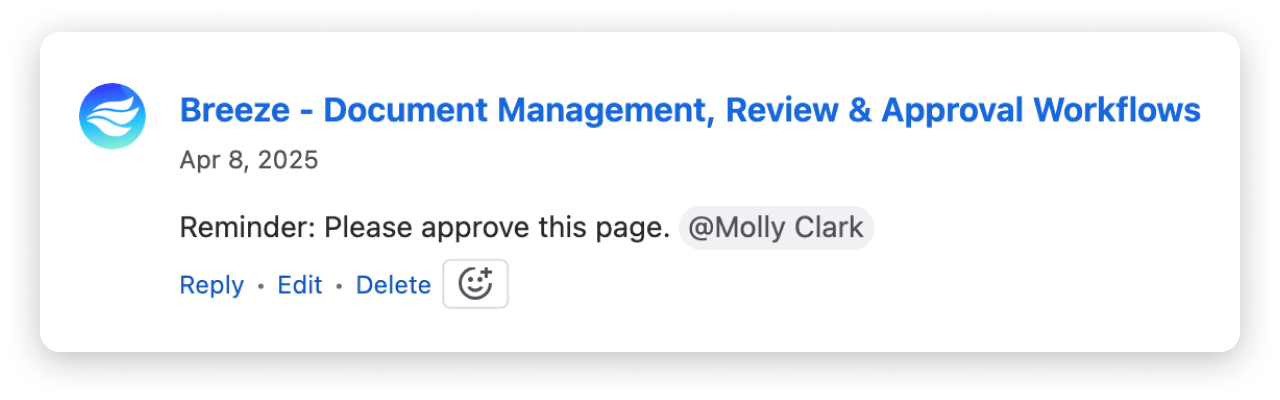
When a reminder is triggered, it adds a page comment, which is used to notify approvers via @mentions. As a result, approvers receive an email and a message in their Confluence notification center (the bell icon in the main menu bar of Confluence).
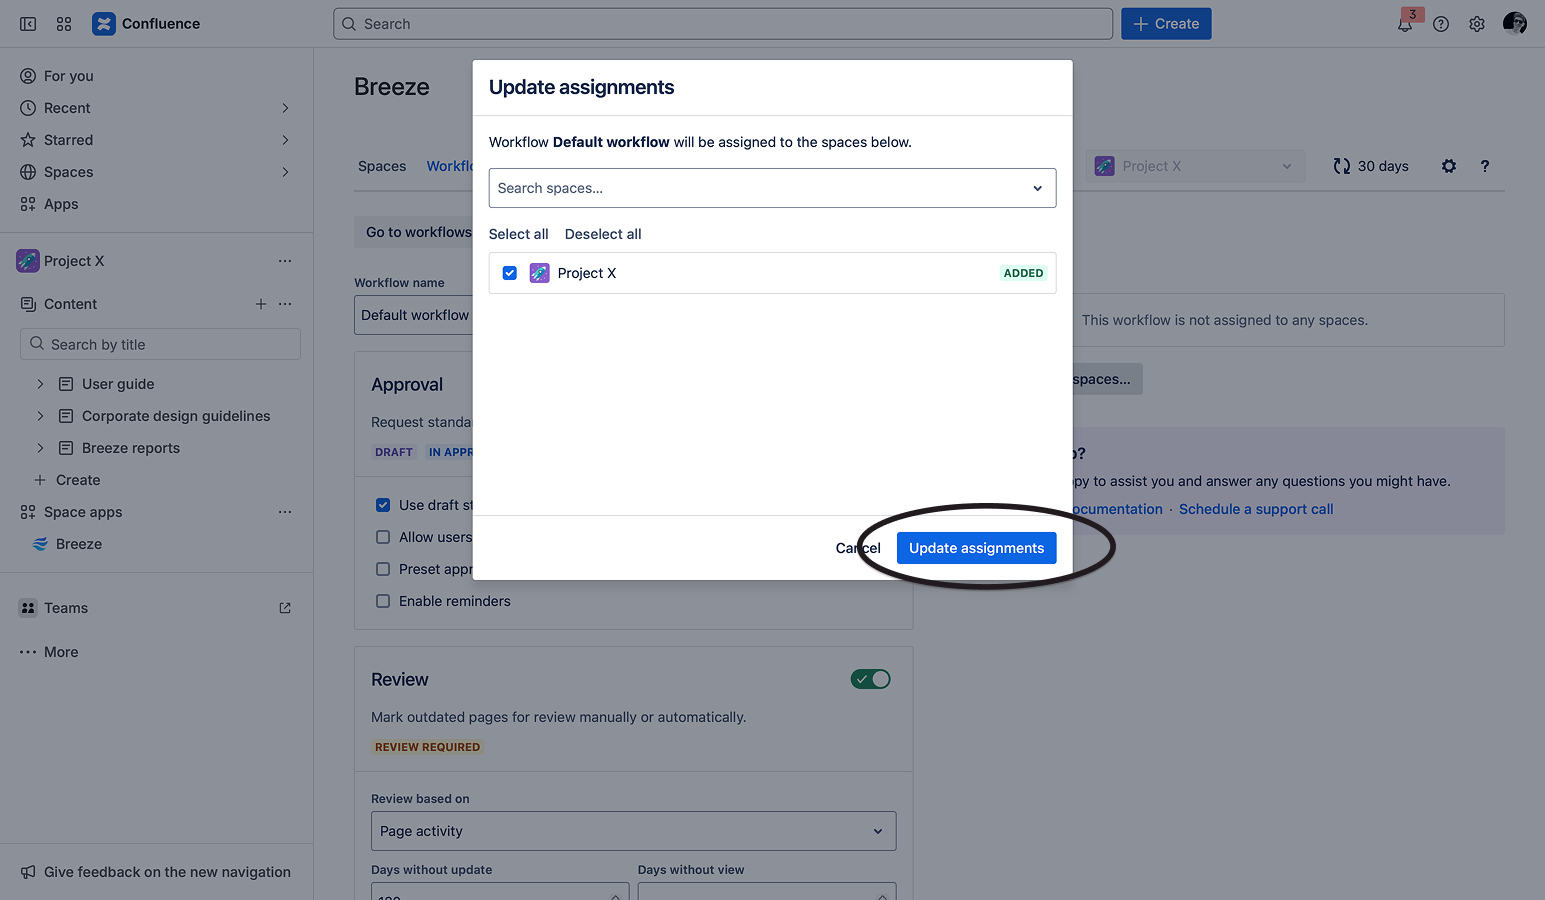
Workflow assignment
Section titled “Workflow assignment”To assign a workflow to one or multiple spaces, click Update assigned spaces….

Search for the desired spaces and add them to the assignment list.
Click Update assignments to assign the workflow to the selected spaces.
Workflow customization
Section titled “Workflow customization”By default, the approval workflow settings apply to all pages within the assigned spaces. While you can assign different workflows to different spaces, workflow customization lets you define unique workflow settings for specific sections or page trees within a single space.
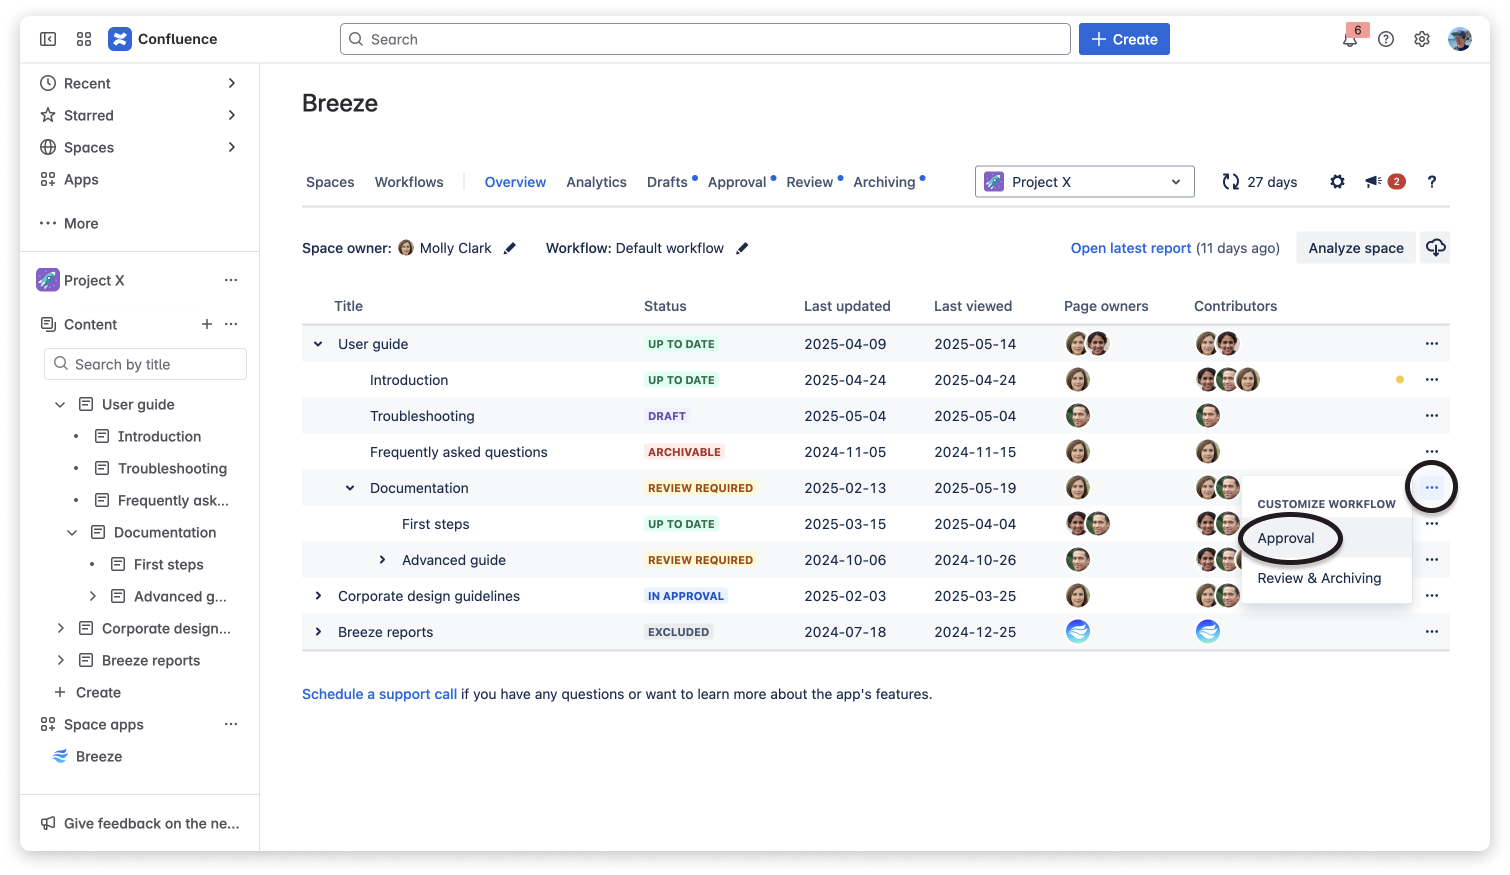
To customize the approval workflow for a page and all its descendants, open the Overview component and click on the ”…” button at the very right. Select Approval to open the customization form.
Currently, Breeze supports the customization of approval presets. As a result, you can preset different approver groups and approval types for various page trees within a space.
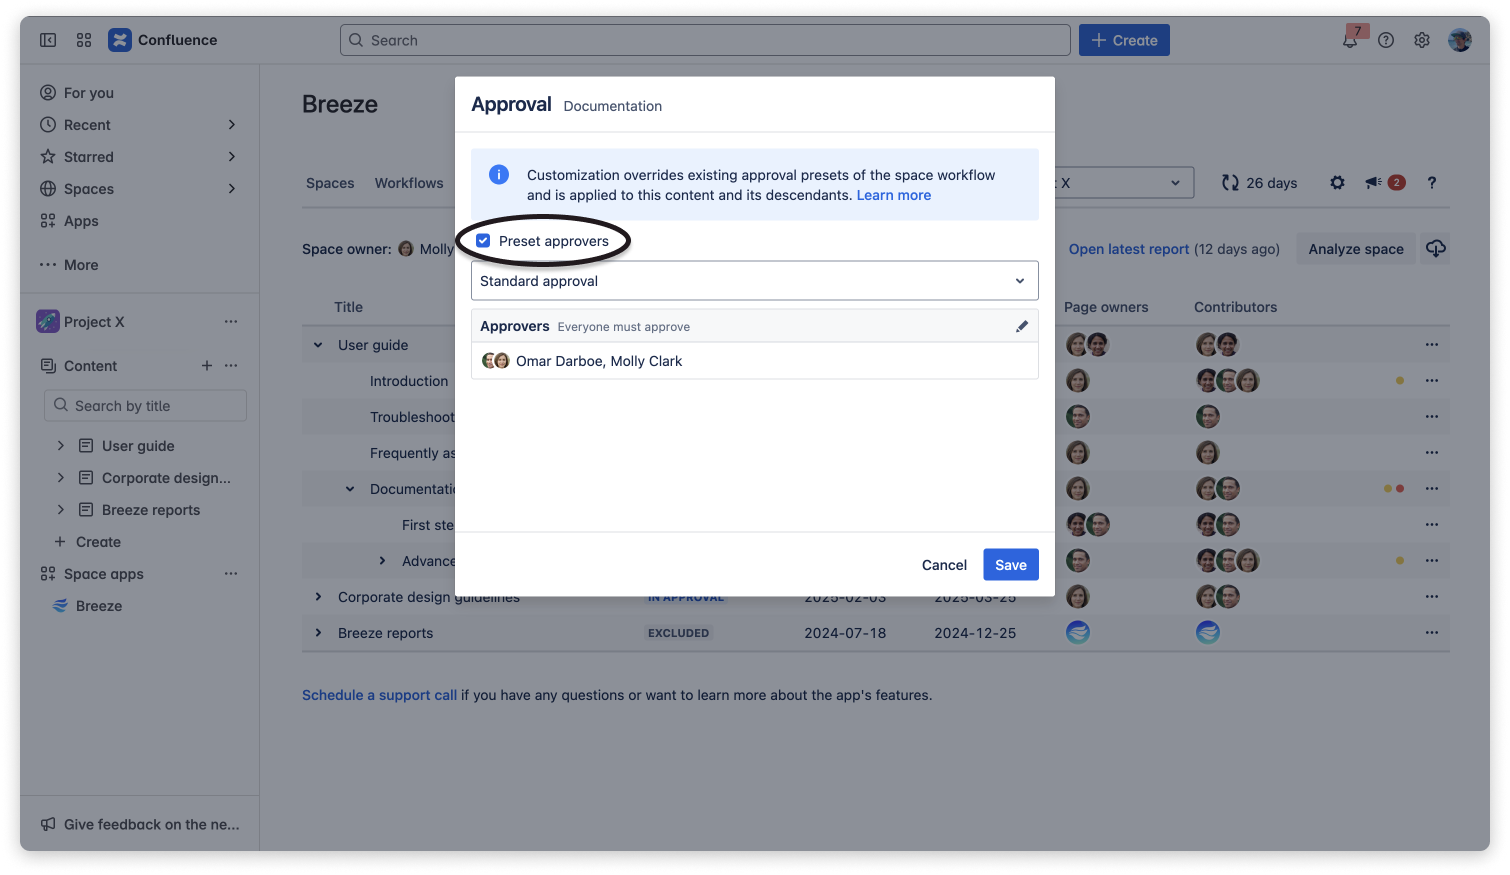
Click Save to apply your customized approval settings to the selected page and all its descendants.
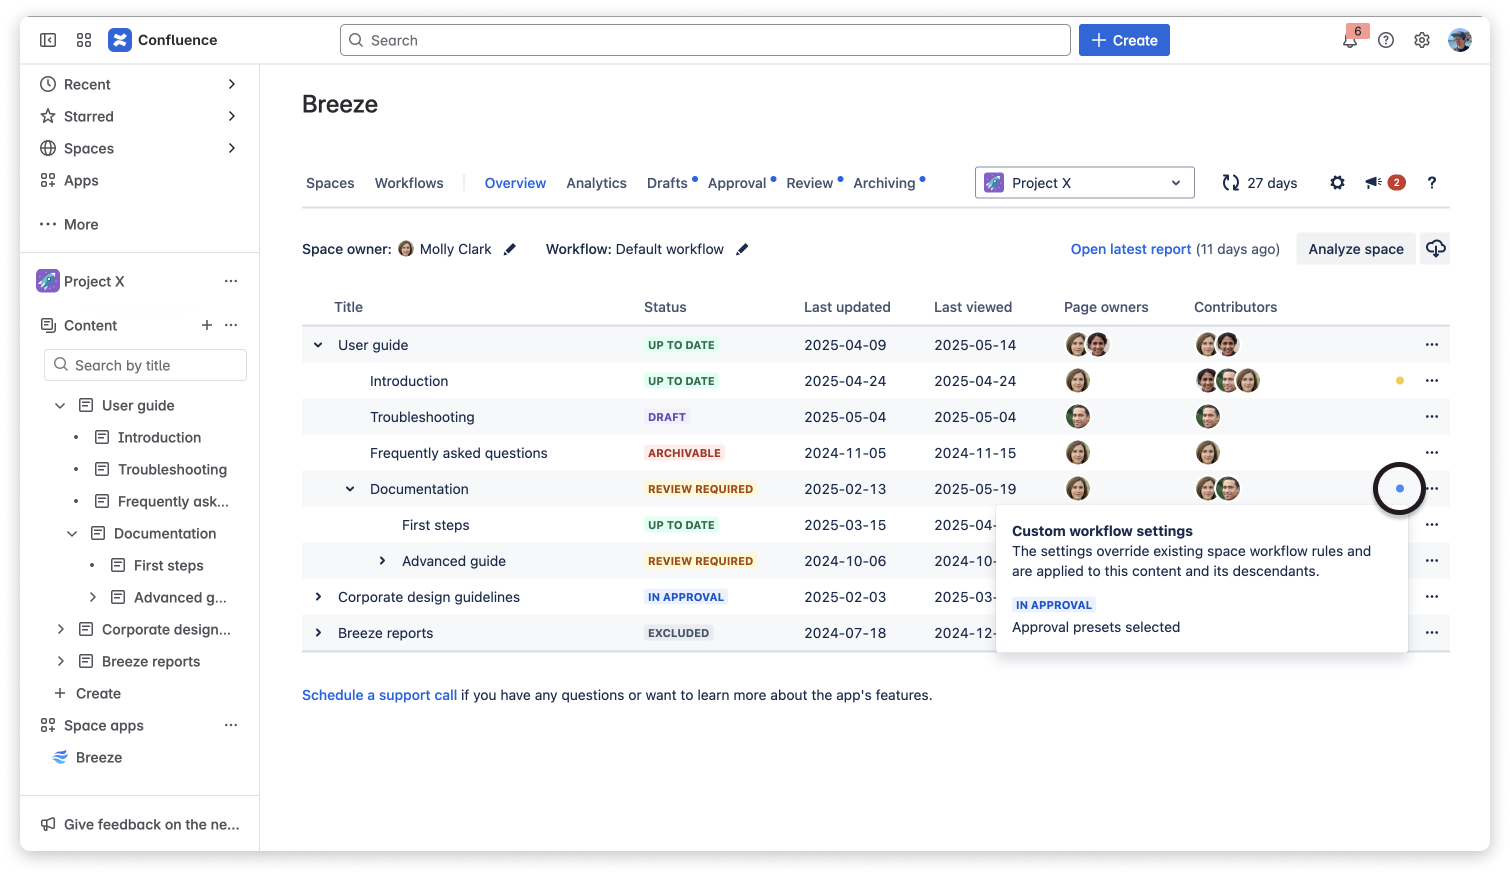
If a custom approval preset is defined, the Overview component will show a blue dot representing that this page defines a custom preset for itself and all its descendants.
Starting an approval request
Section titled “Starting an approval request”Creating a working copy
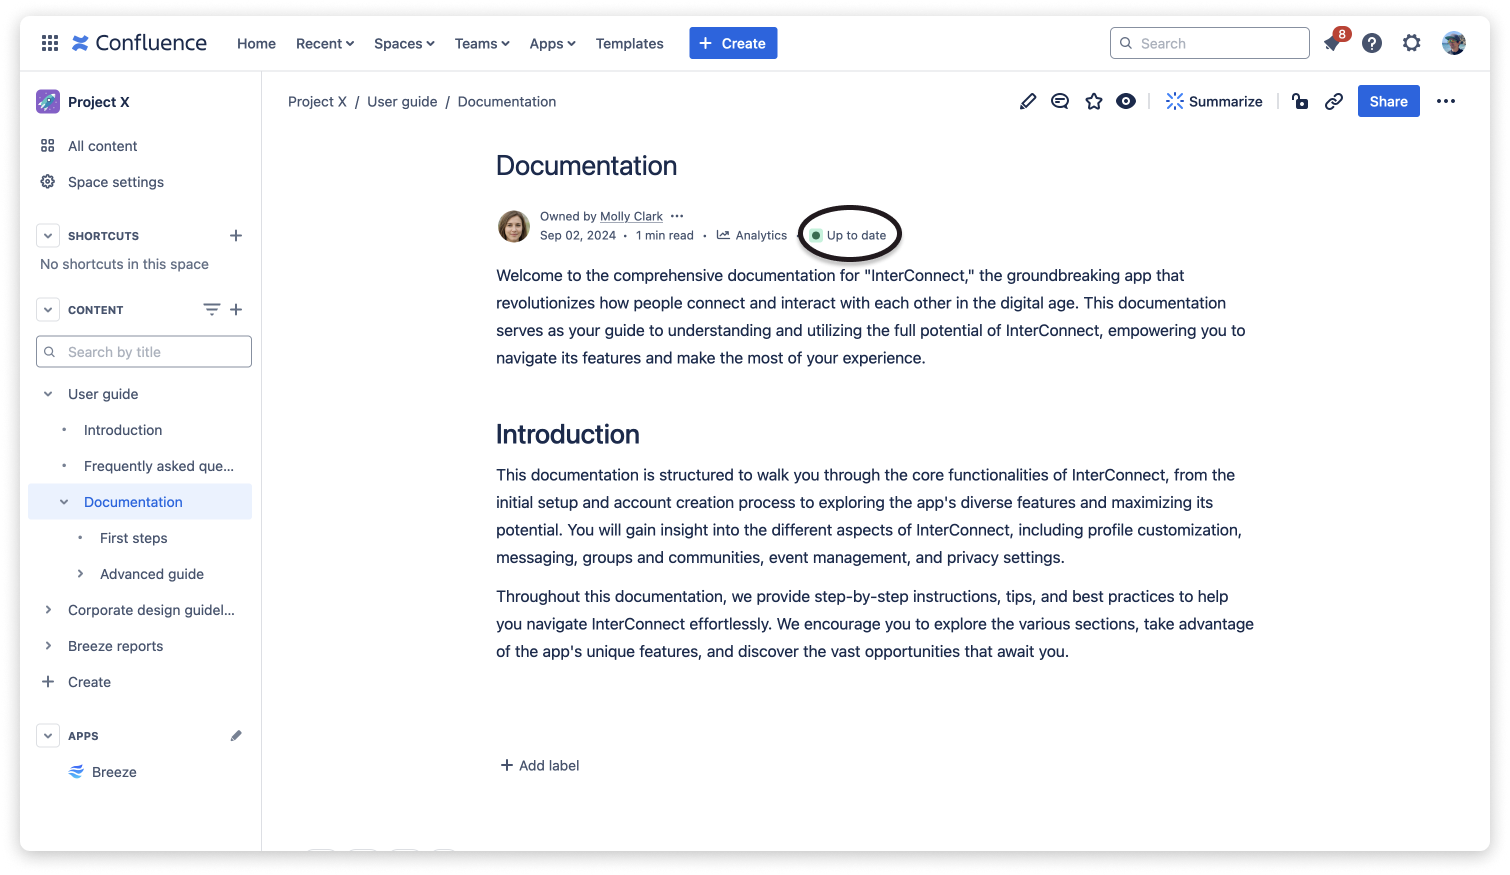
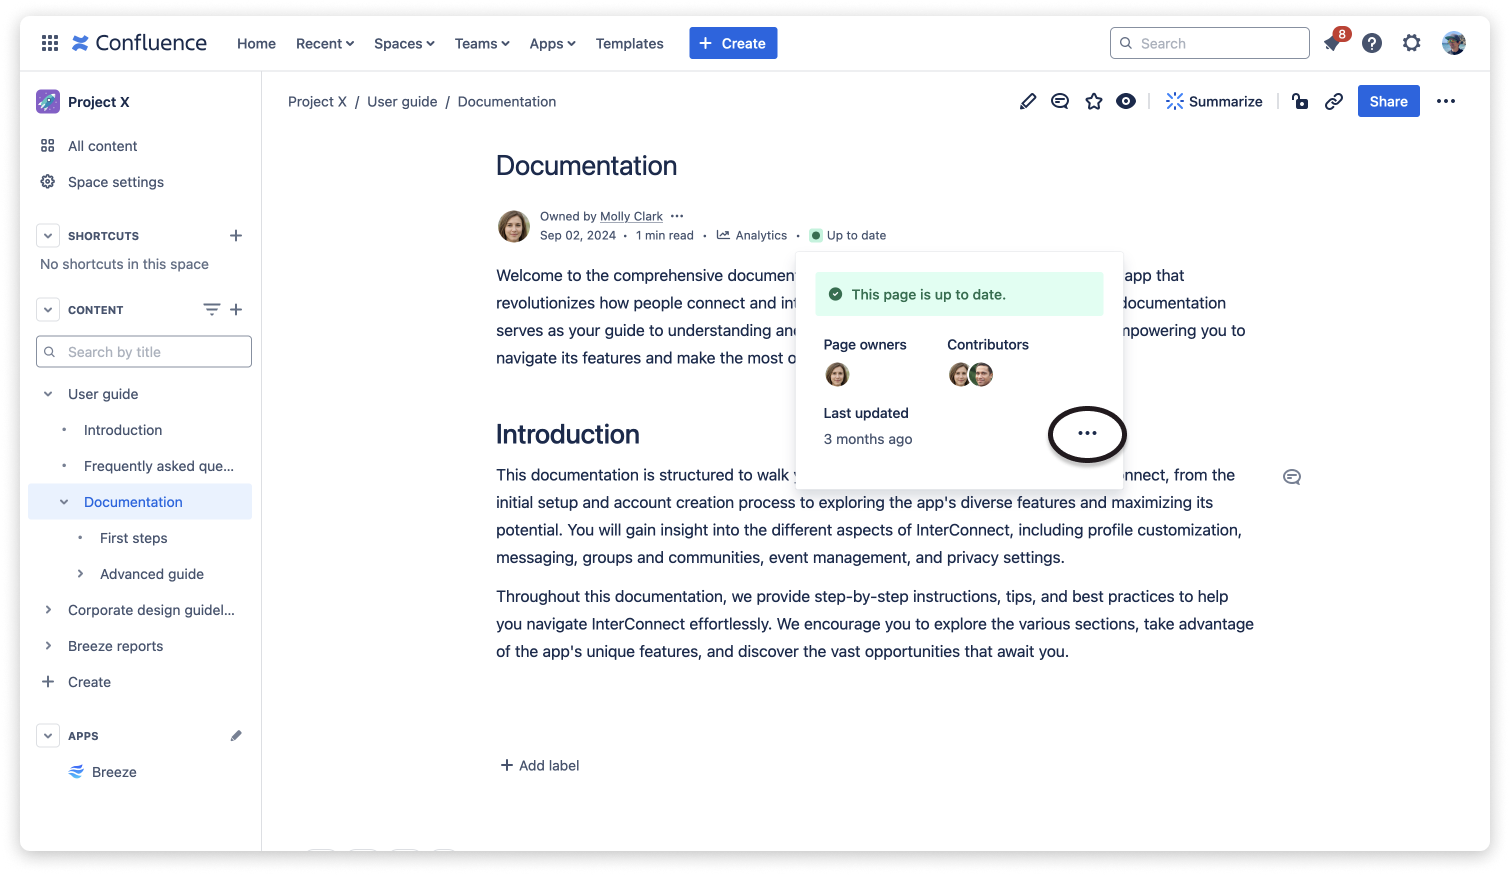
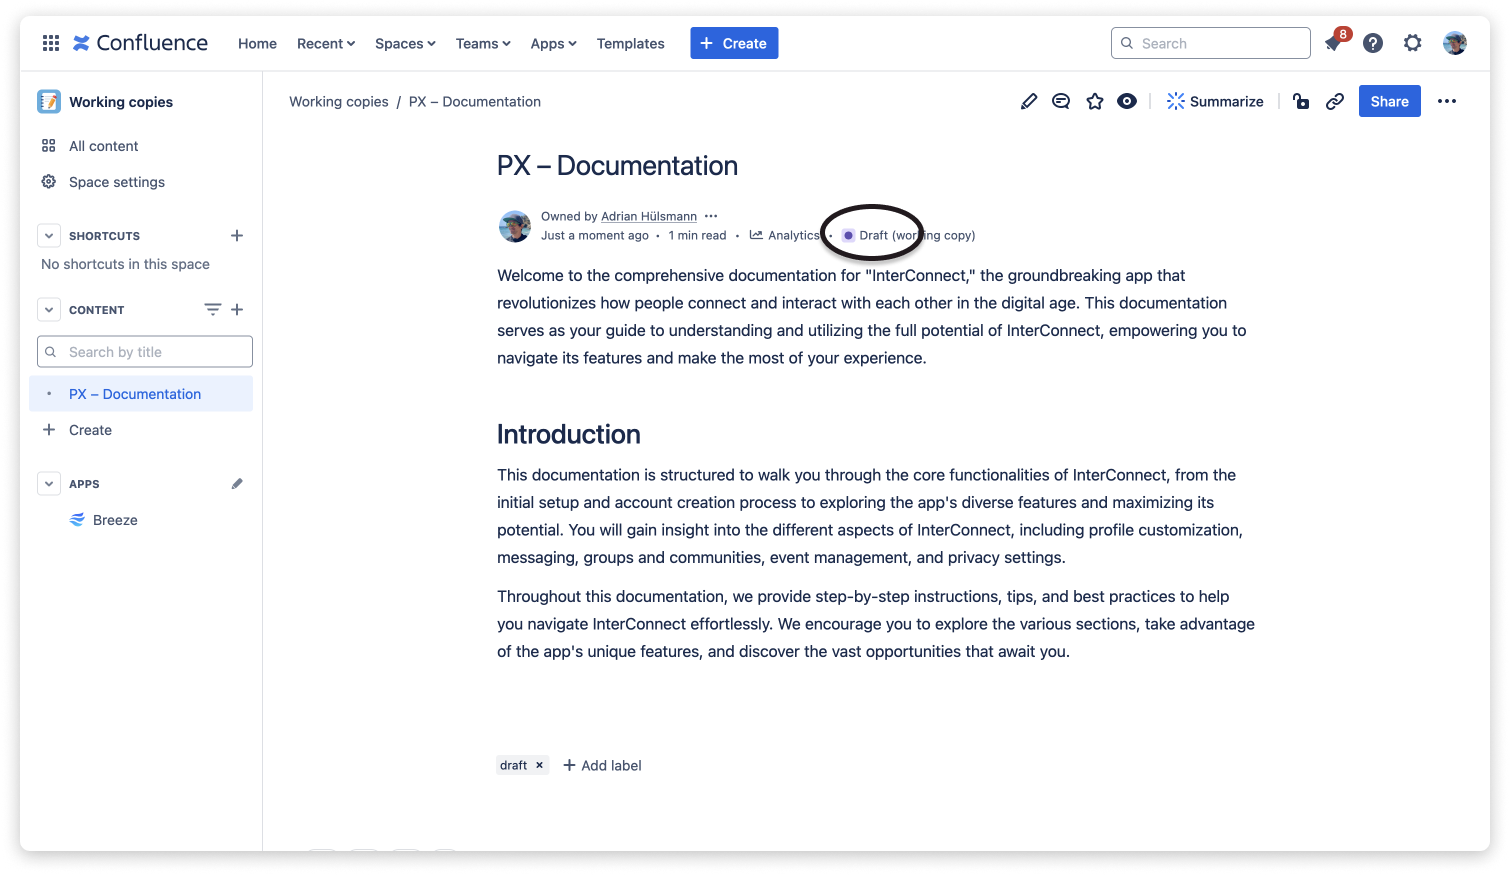
Section titled “Creating a working copy”If the workflow is configured to use working copies, users have to create a working copy before requesting approval. To create a working copy of a page, click the content status at the top of the page.
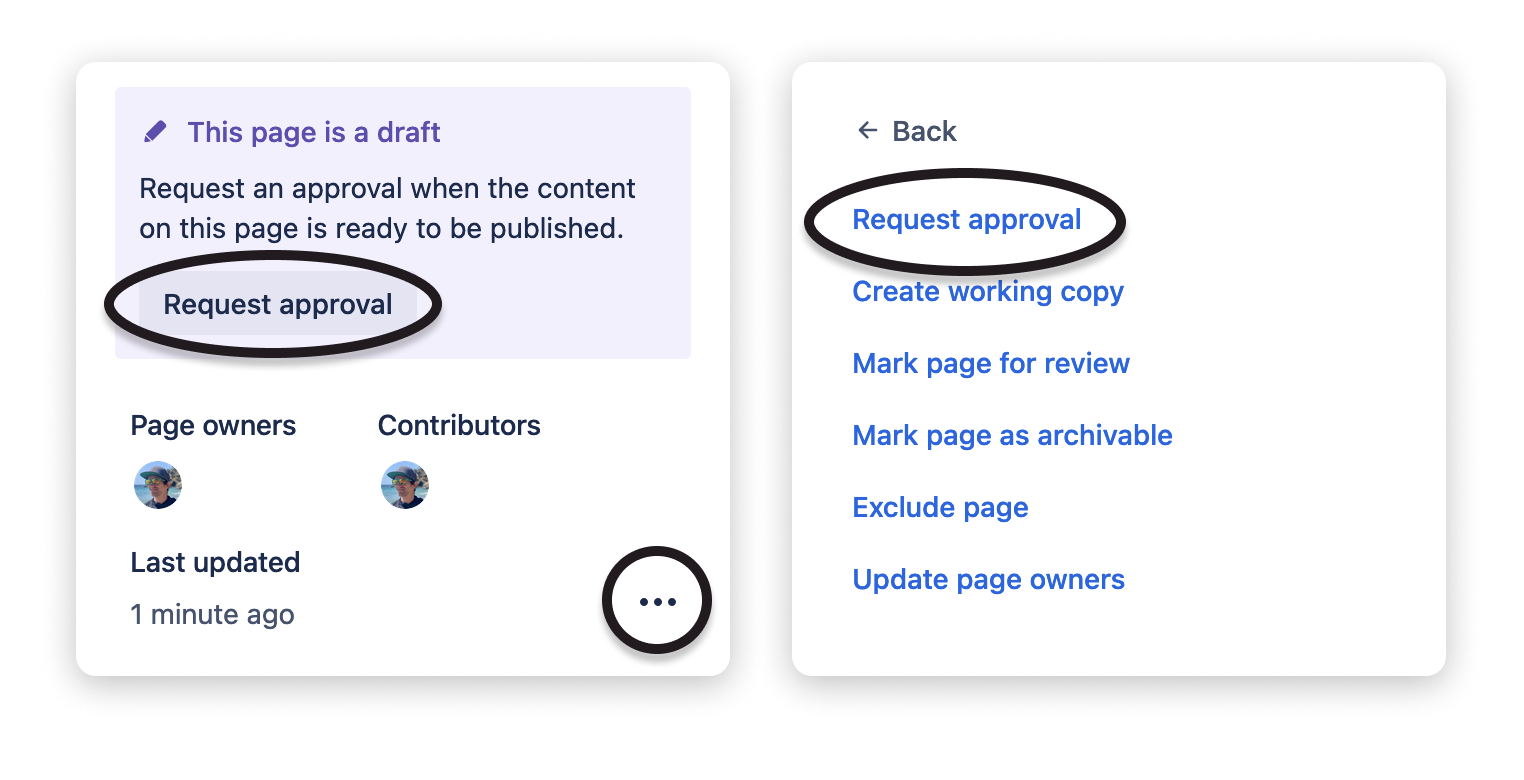
If you have editing permissions for the page, click the … button to access more actions.
Then click Create working copy.

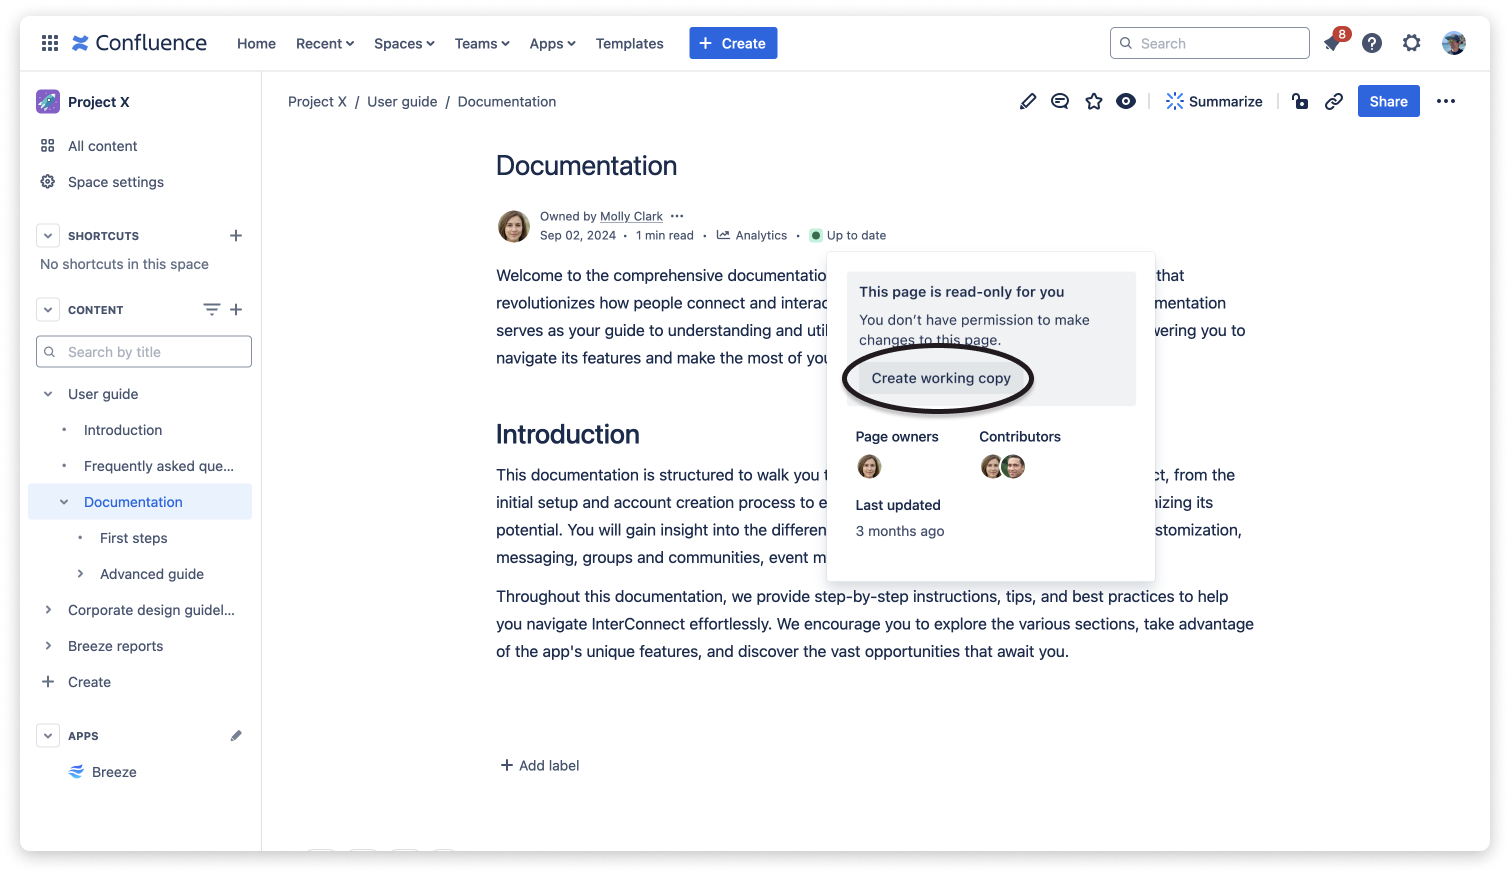
If you have read-only permissions for the page, you do not need to open the more actions menu (because you can’t). Instead, you can directly click Create working copy.
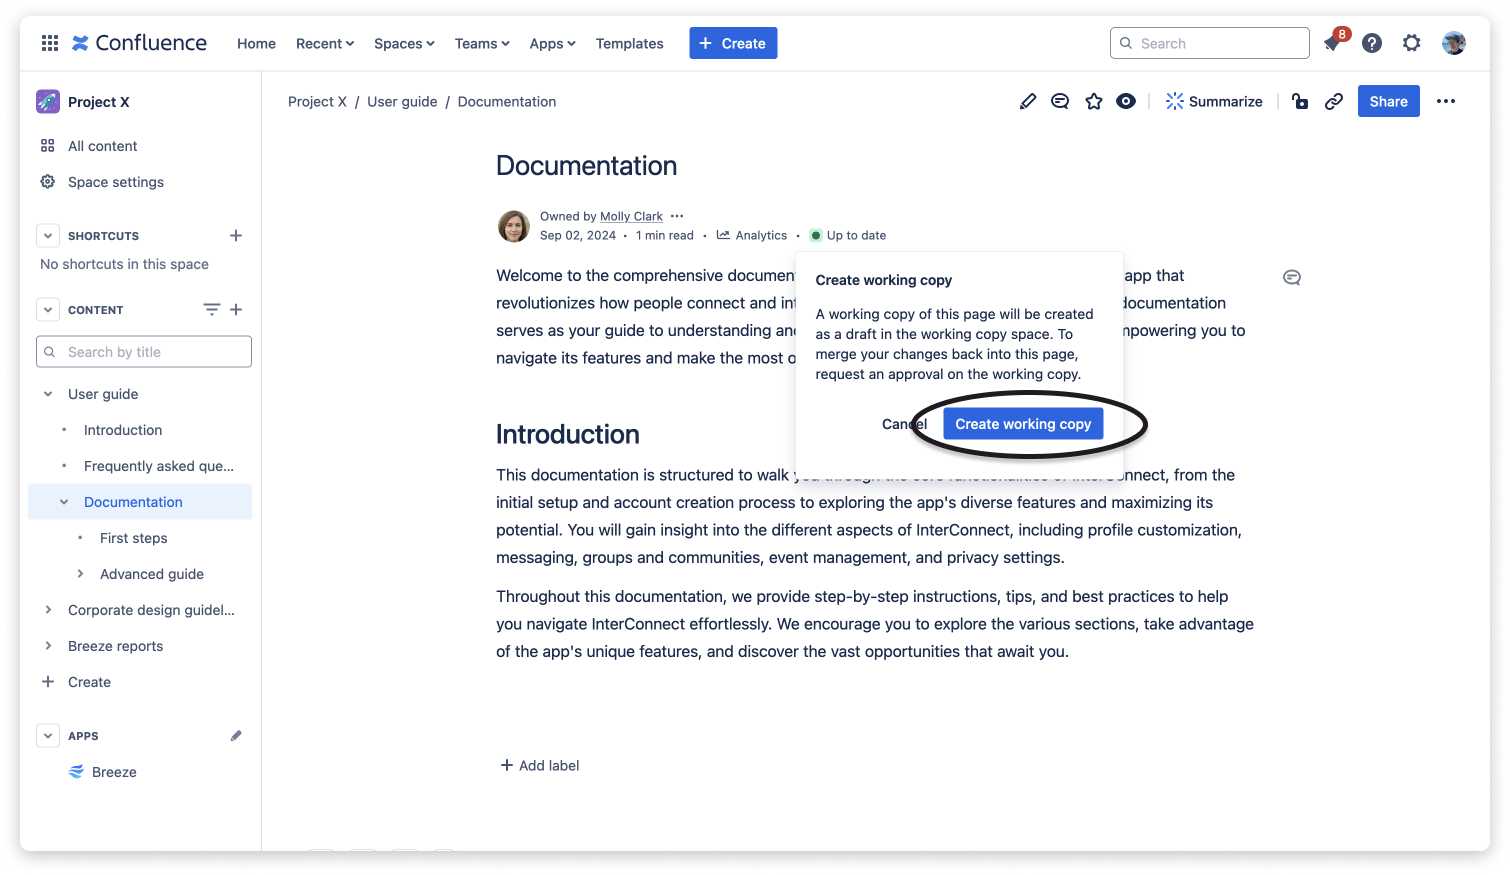
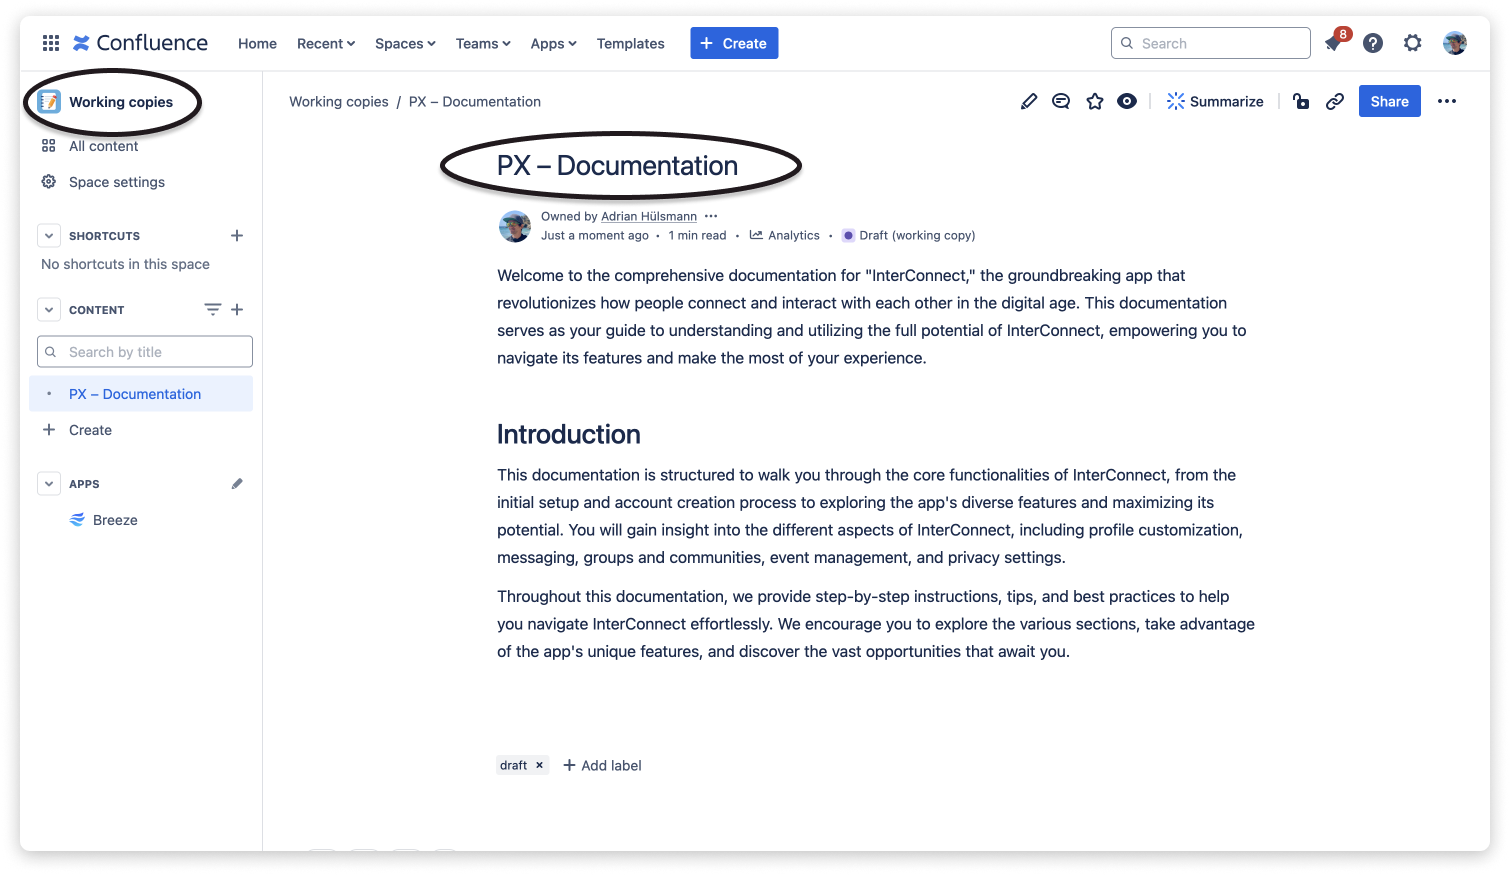
Afterward, click Create working copy. This will clone the content and create a new page with the DRAFT status in the predefined working copy space.
Requesting approval
Section titled “Requesting approval”Requesting approval is equal for the standard approval workflow and a workflow using working copies. Therefore, “page” refers to both standard Confluence pages and working copies in the following.
To request approval for a page, click the content status at the top of the page.
If the page has the DRAFT status, click Request approval. If the page has a different status, click the … button and then Request approval in the actions menu.
This will open the following dialog. Please note that there may be less options to choose from if the workflow has been configured with approval presets.

Here you can select the approval process (standard or multi-step), select approvers, and choose an optional due date for the page approval.
When adding approvers, you can choose an approval type from the following options:
- Everyone must approve - a page is only approved by a unanimous decision
- First response decides - the first vote of whichever approver decides
- Majority must approve - a page is approved or rejected by a majority vote
Clicking Request approval will set the status to IN APPROVAL and add a page comment, which is used to notify approvers via @mentions and show their decisions when approving or rejecting the page.
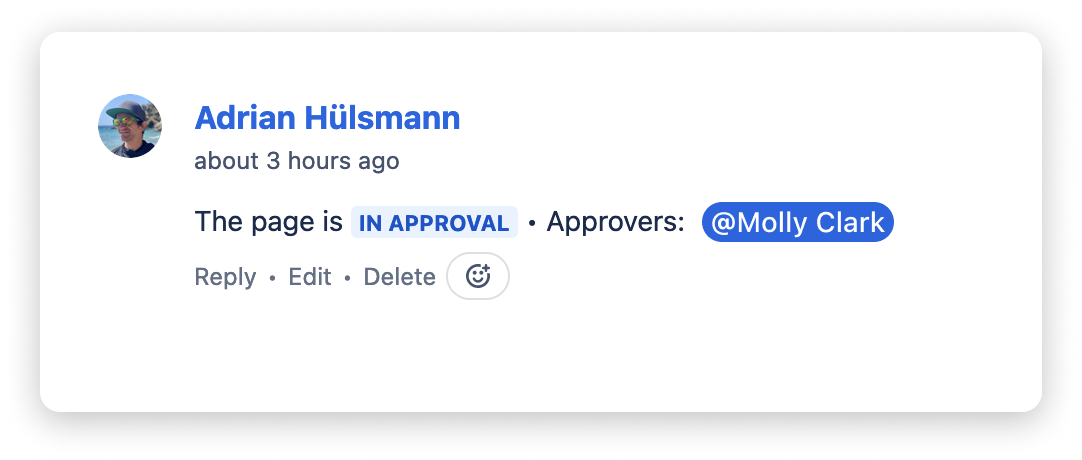
When a user is mentioned to approve the page, he receives an email and a message in the Confluence notification center (the bell icon in the main menu bar of Confluence). Confluence also provides Slack notifications, which are explained here.
Approving or rejecting requests
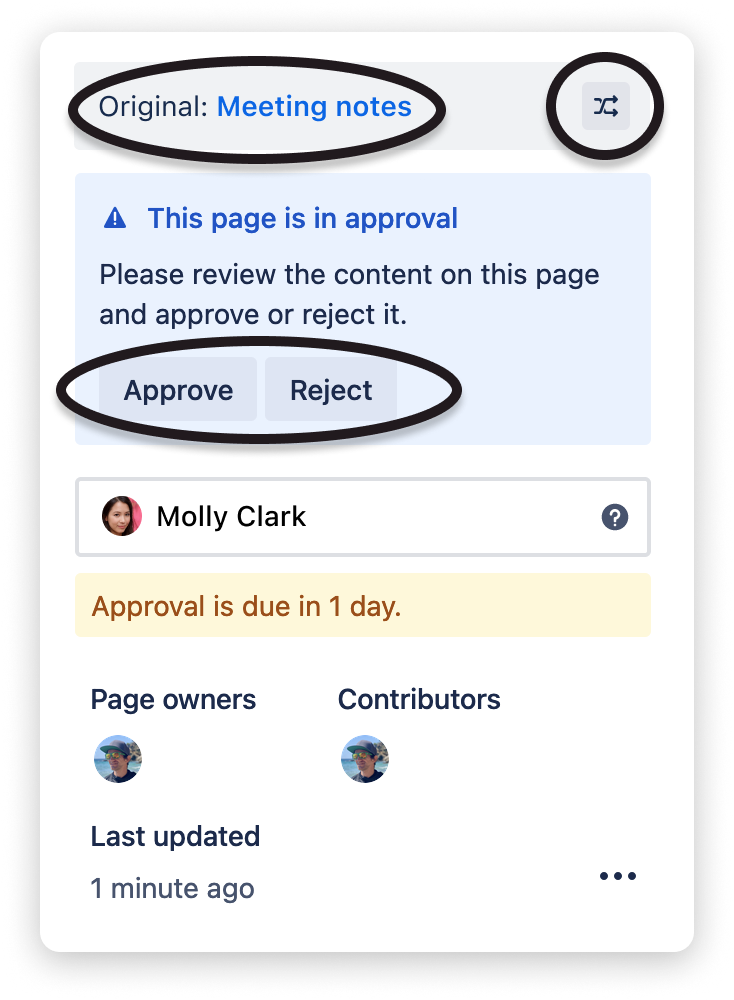
Section titled “Approving or rejecting requests”After being notified about the request and checking the content of a page, click the content status at the top of the page.

In the status dialog, you can either click Approve or Reject. If the page is a working copy, the content status dialog also provides a link to the original page and a button for comparing changes made in the working copy with the originally cloned content, allowing approvers to quickly understand what has changed.
After approving/rejecting the page, you can provide a comment. Depending on your choice this is either optional (in case of approval) or obligatory (in case of rejection).
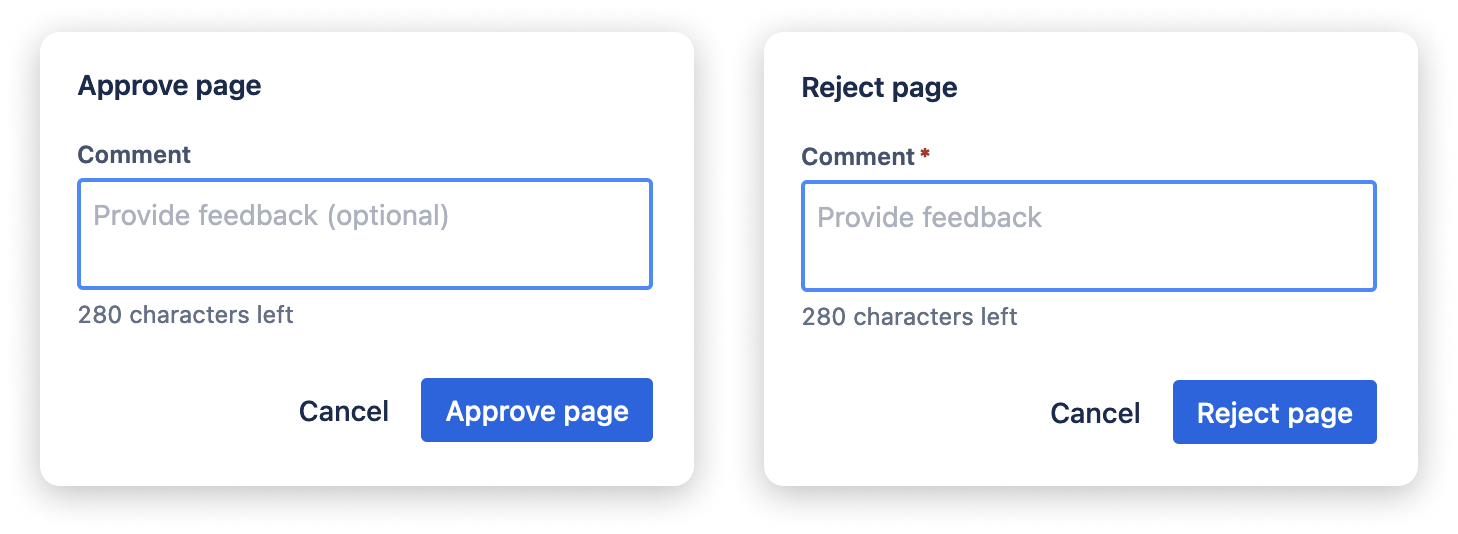
After clicking Approve page (in case of approving) or Reject page (in case of rejecting), your decision shows in the page comments as a reply to the original request.
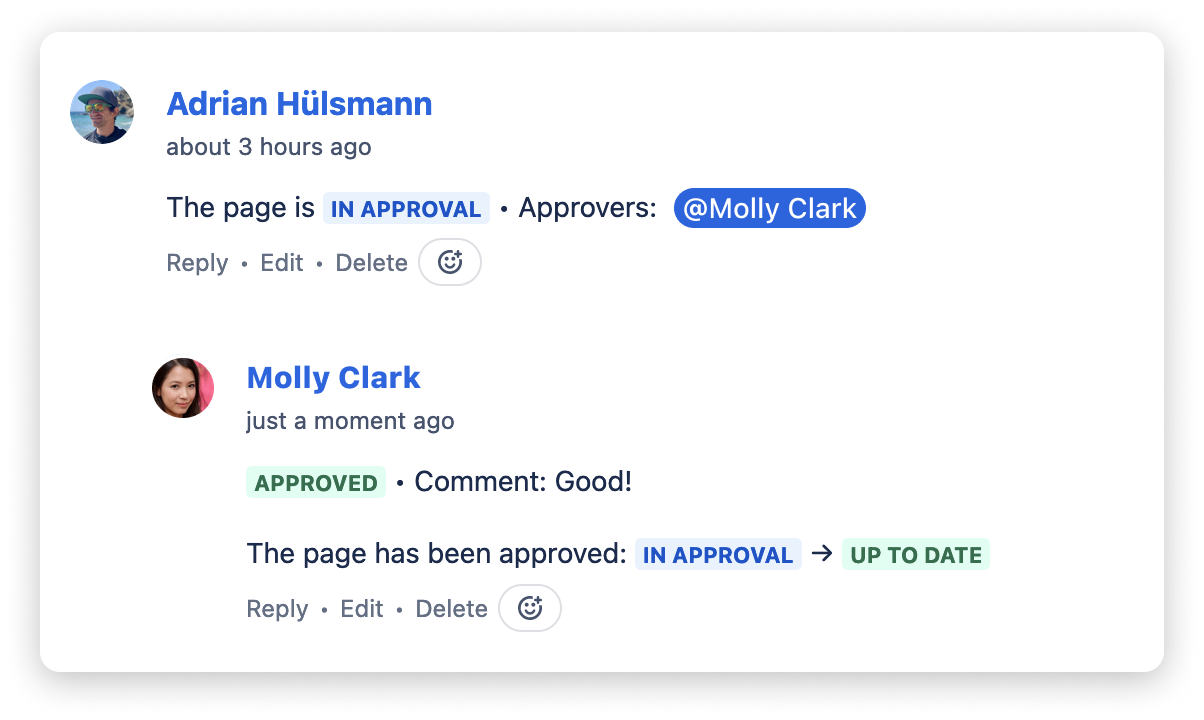
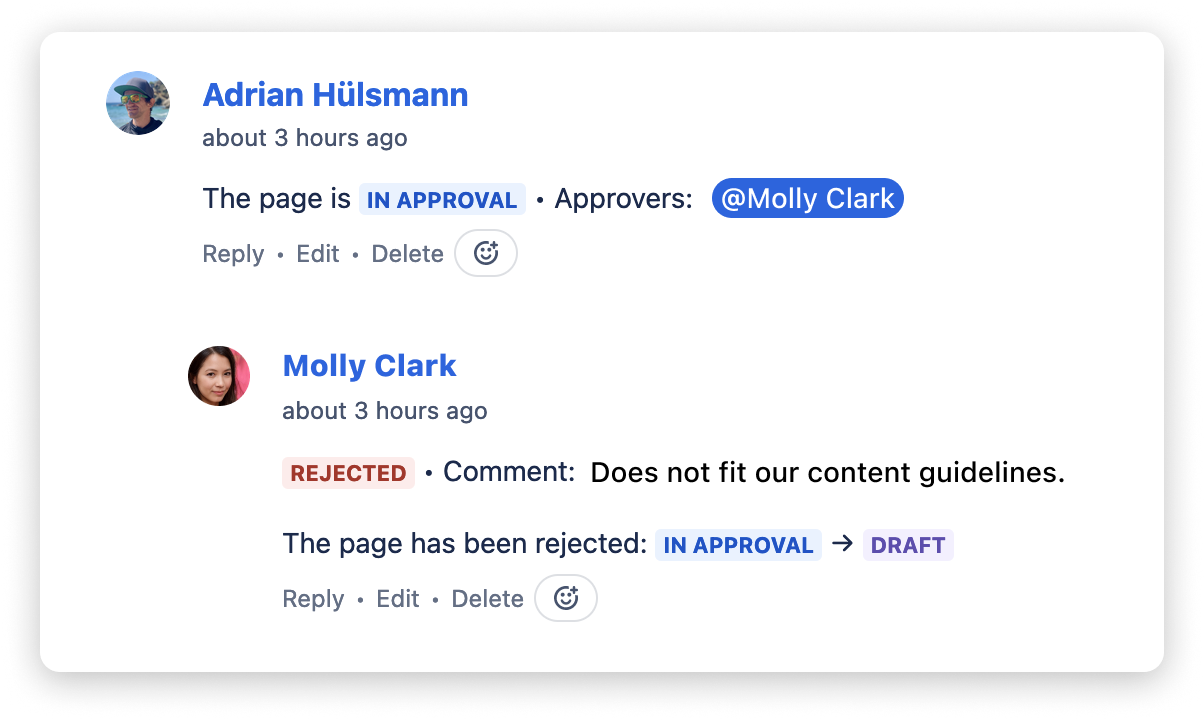
Depending on the approval type, the page may stay in the IN APPROVAL status (e.g., if not all approvers have made their decision yet) or automatically switch to the UP TO DATE status if it is approved or to the DRAFT status if the approval is rejected.
While the approval request is now finished for standard pages, working copies require one more step, which is merging the approved content of the working copy into the original page.
For this, the latest approver necessary for approving the page is asked to merge the working copy into the original page.
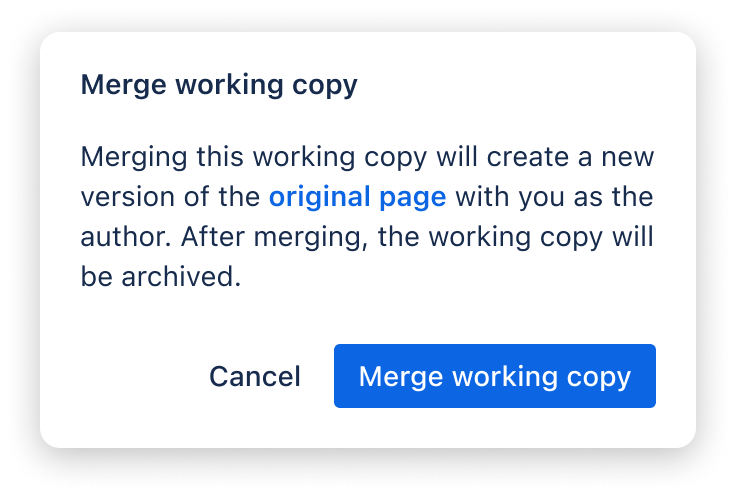
Clicking Merge working copy will merge the content of the working copy into the original page (including attachments) and create a new page version. The user executing the merge will become the author of this new page version.
After the merge, Breeze automatically archives the working copy (for paid Confluence plans) or deletes it (for the free Confluence plan).