Get started
Thank you for using Supersona! This documentation contains short step-by-step guides that will help you to create and use personas in your Jira projects.
☝️ Important:
This app makes use custom fields, which currently are only supported in company-managed projects.
In team-managed projects you won’t be able to add personas to issues.
So please use company-managed projects instead.
App setup - how to add the Persona custom field
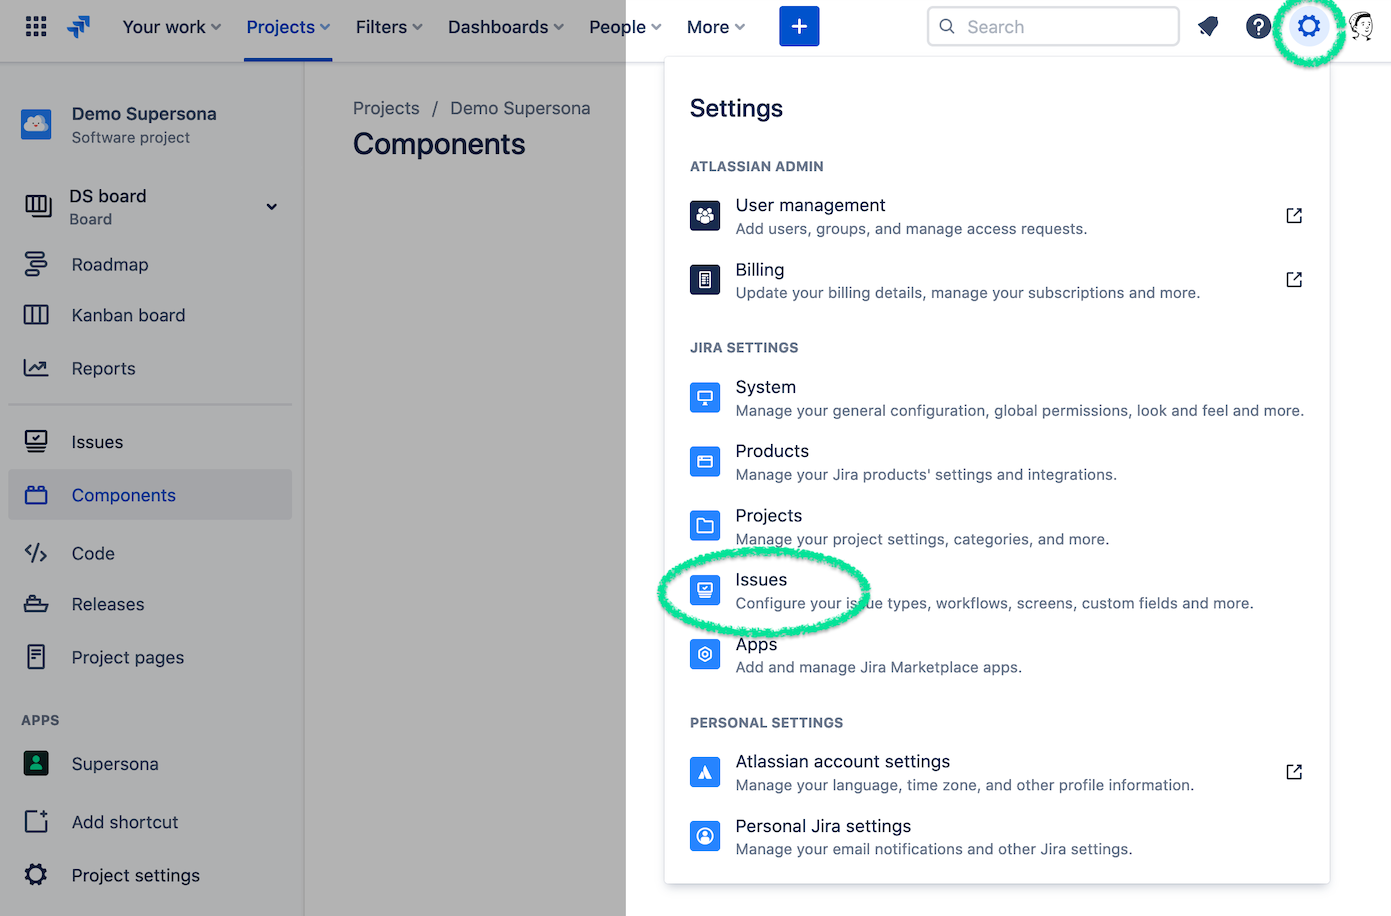
Section titled “App setup - how to add the Persona custom field”- Go to Settings → Issues (make sure to be in a company-managed project)
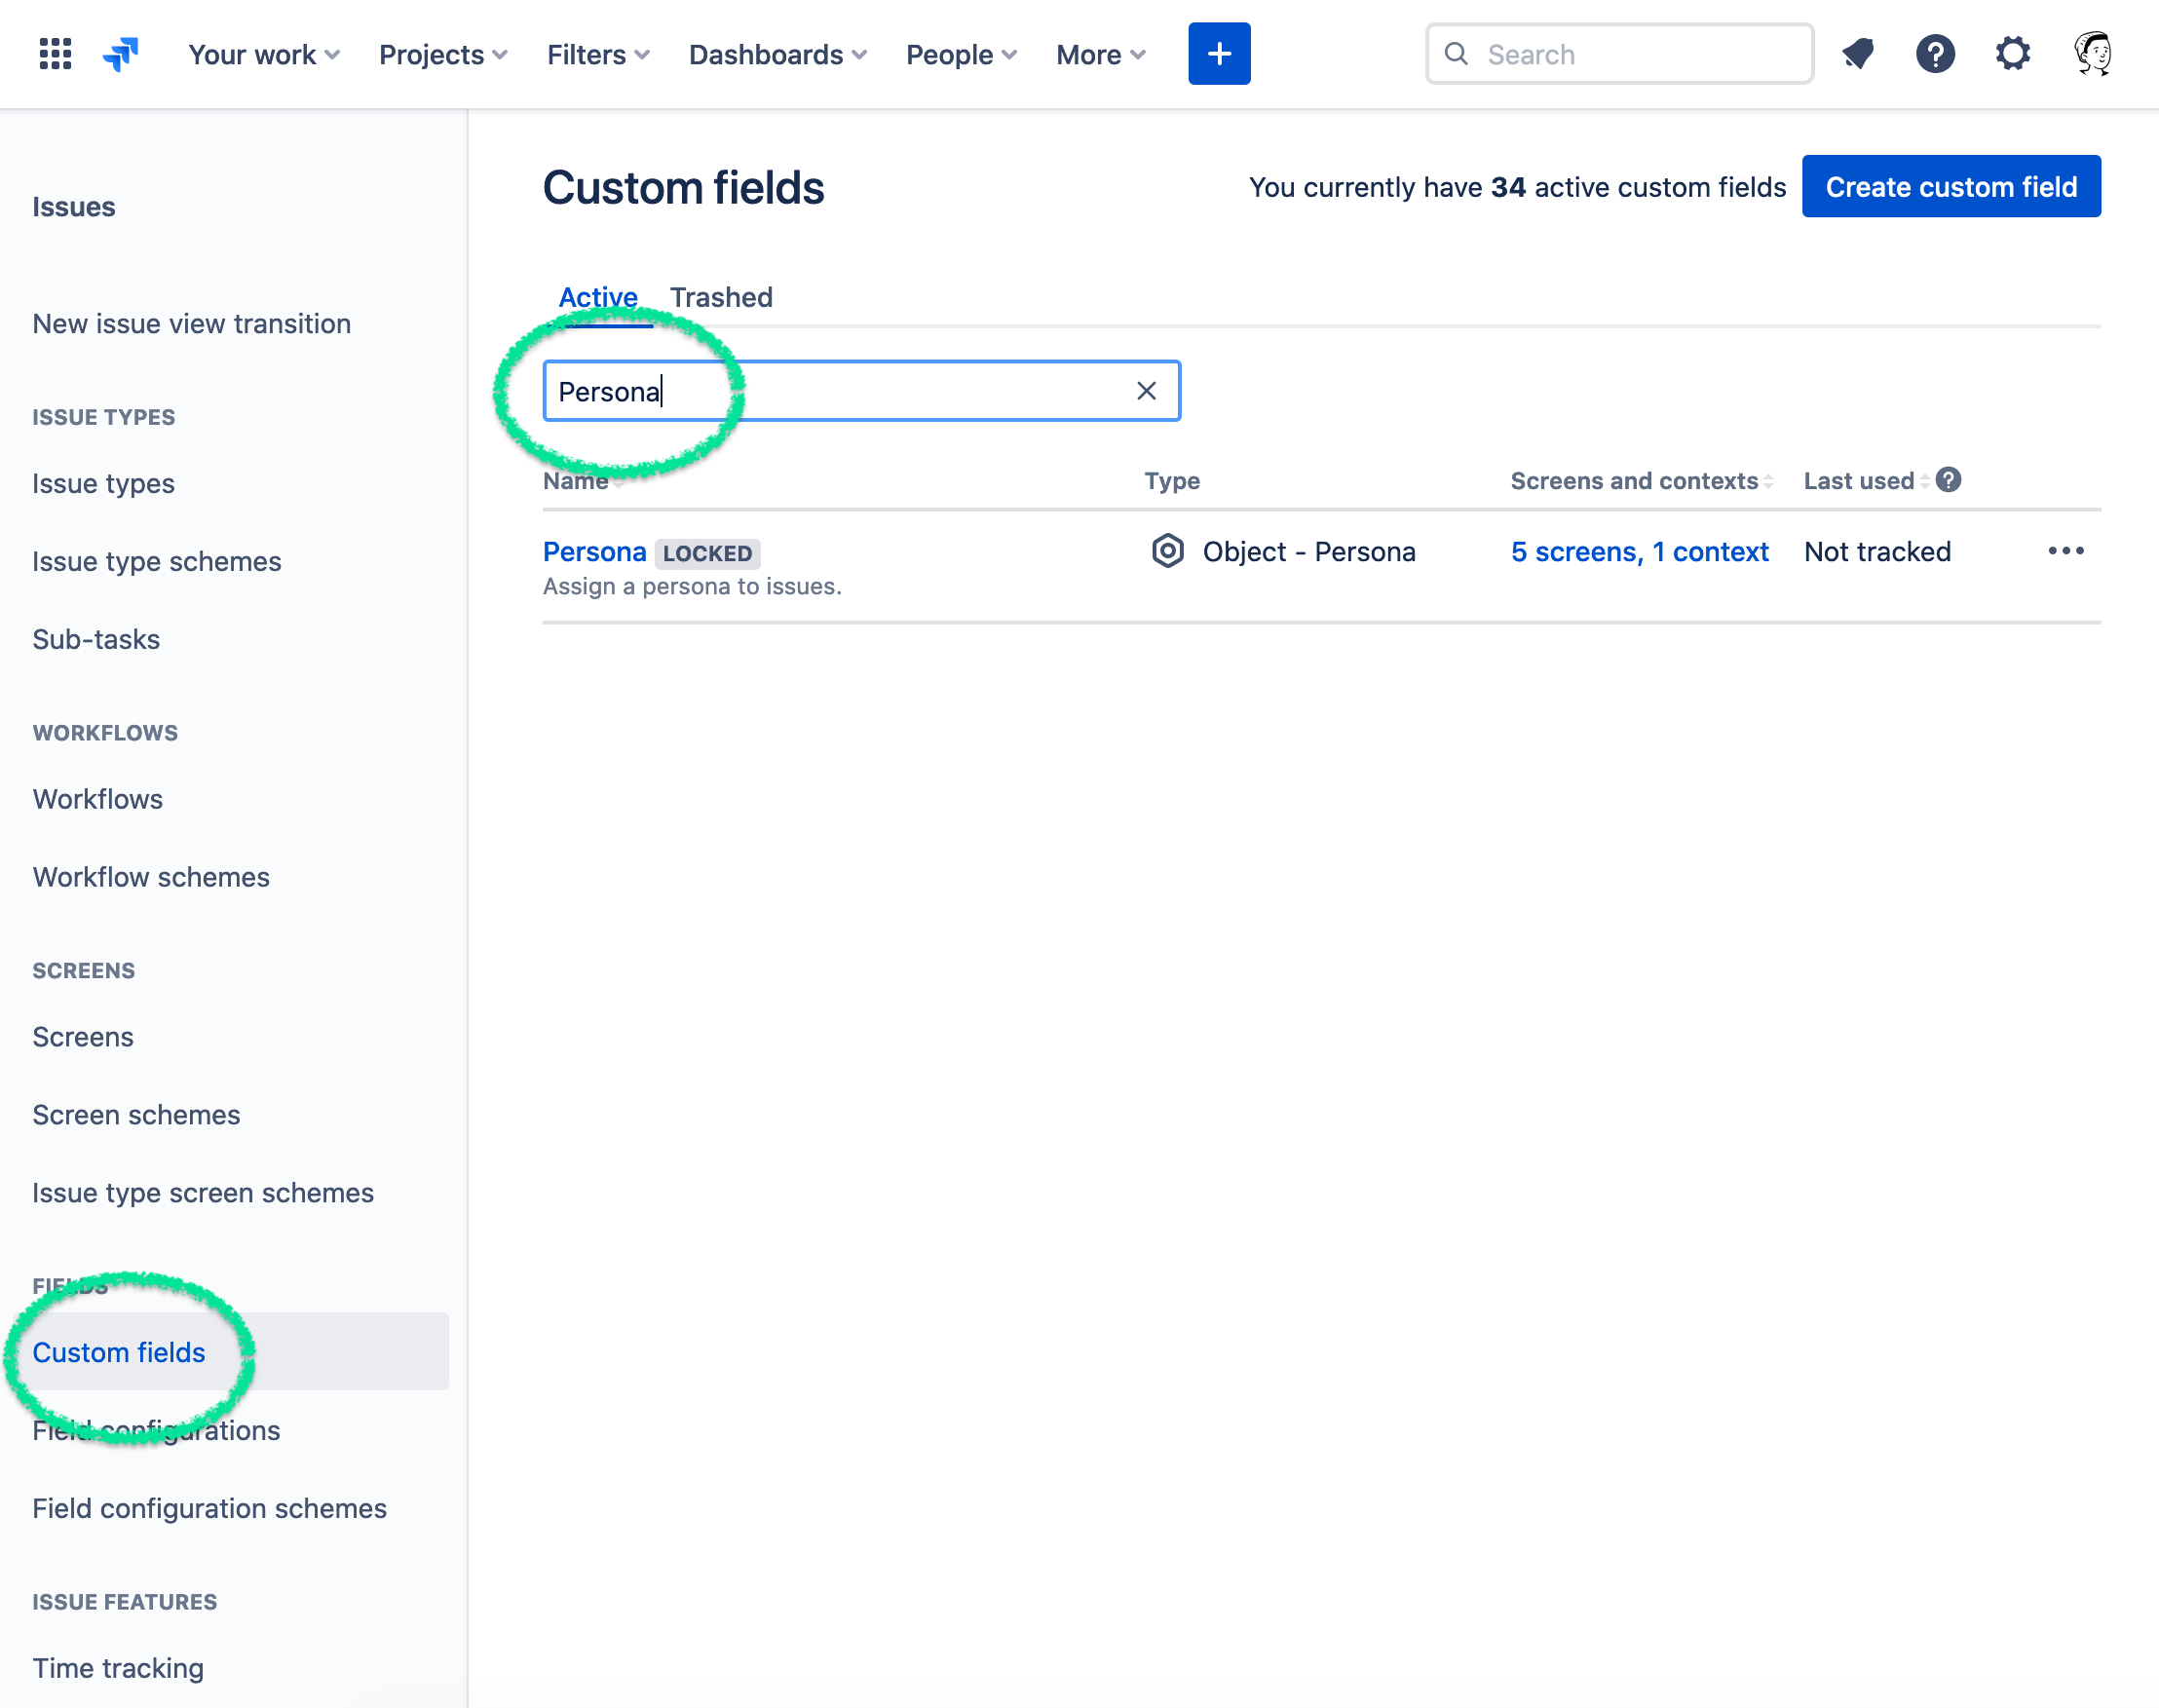
- Go to Custom fields, then search for “Persona”
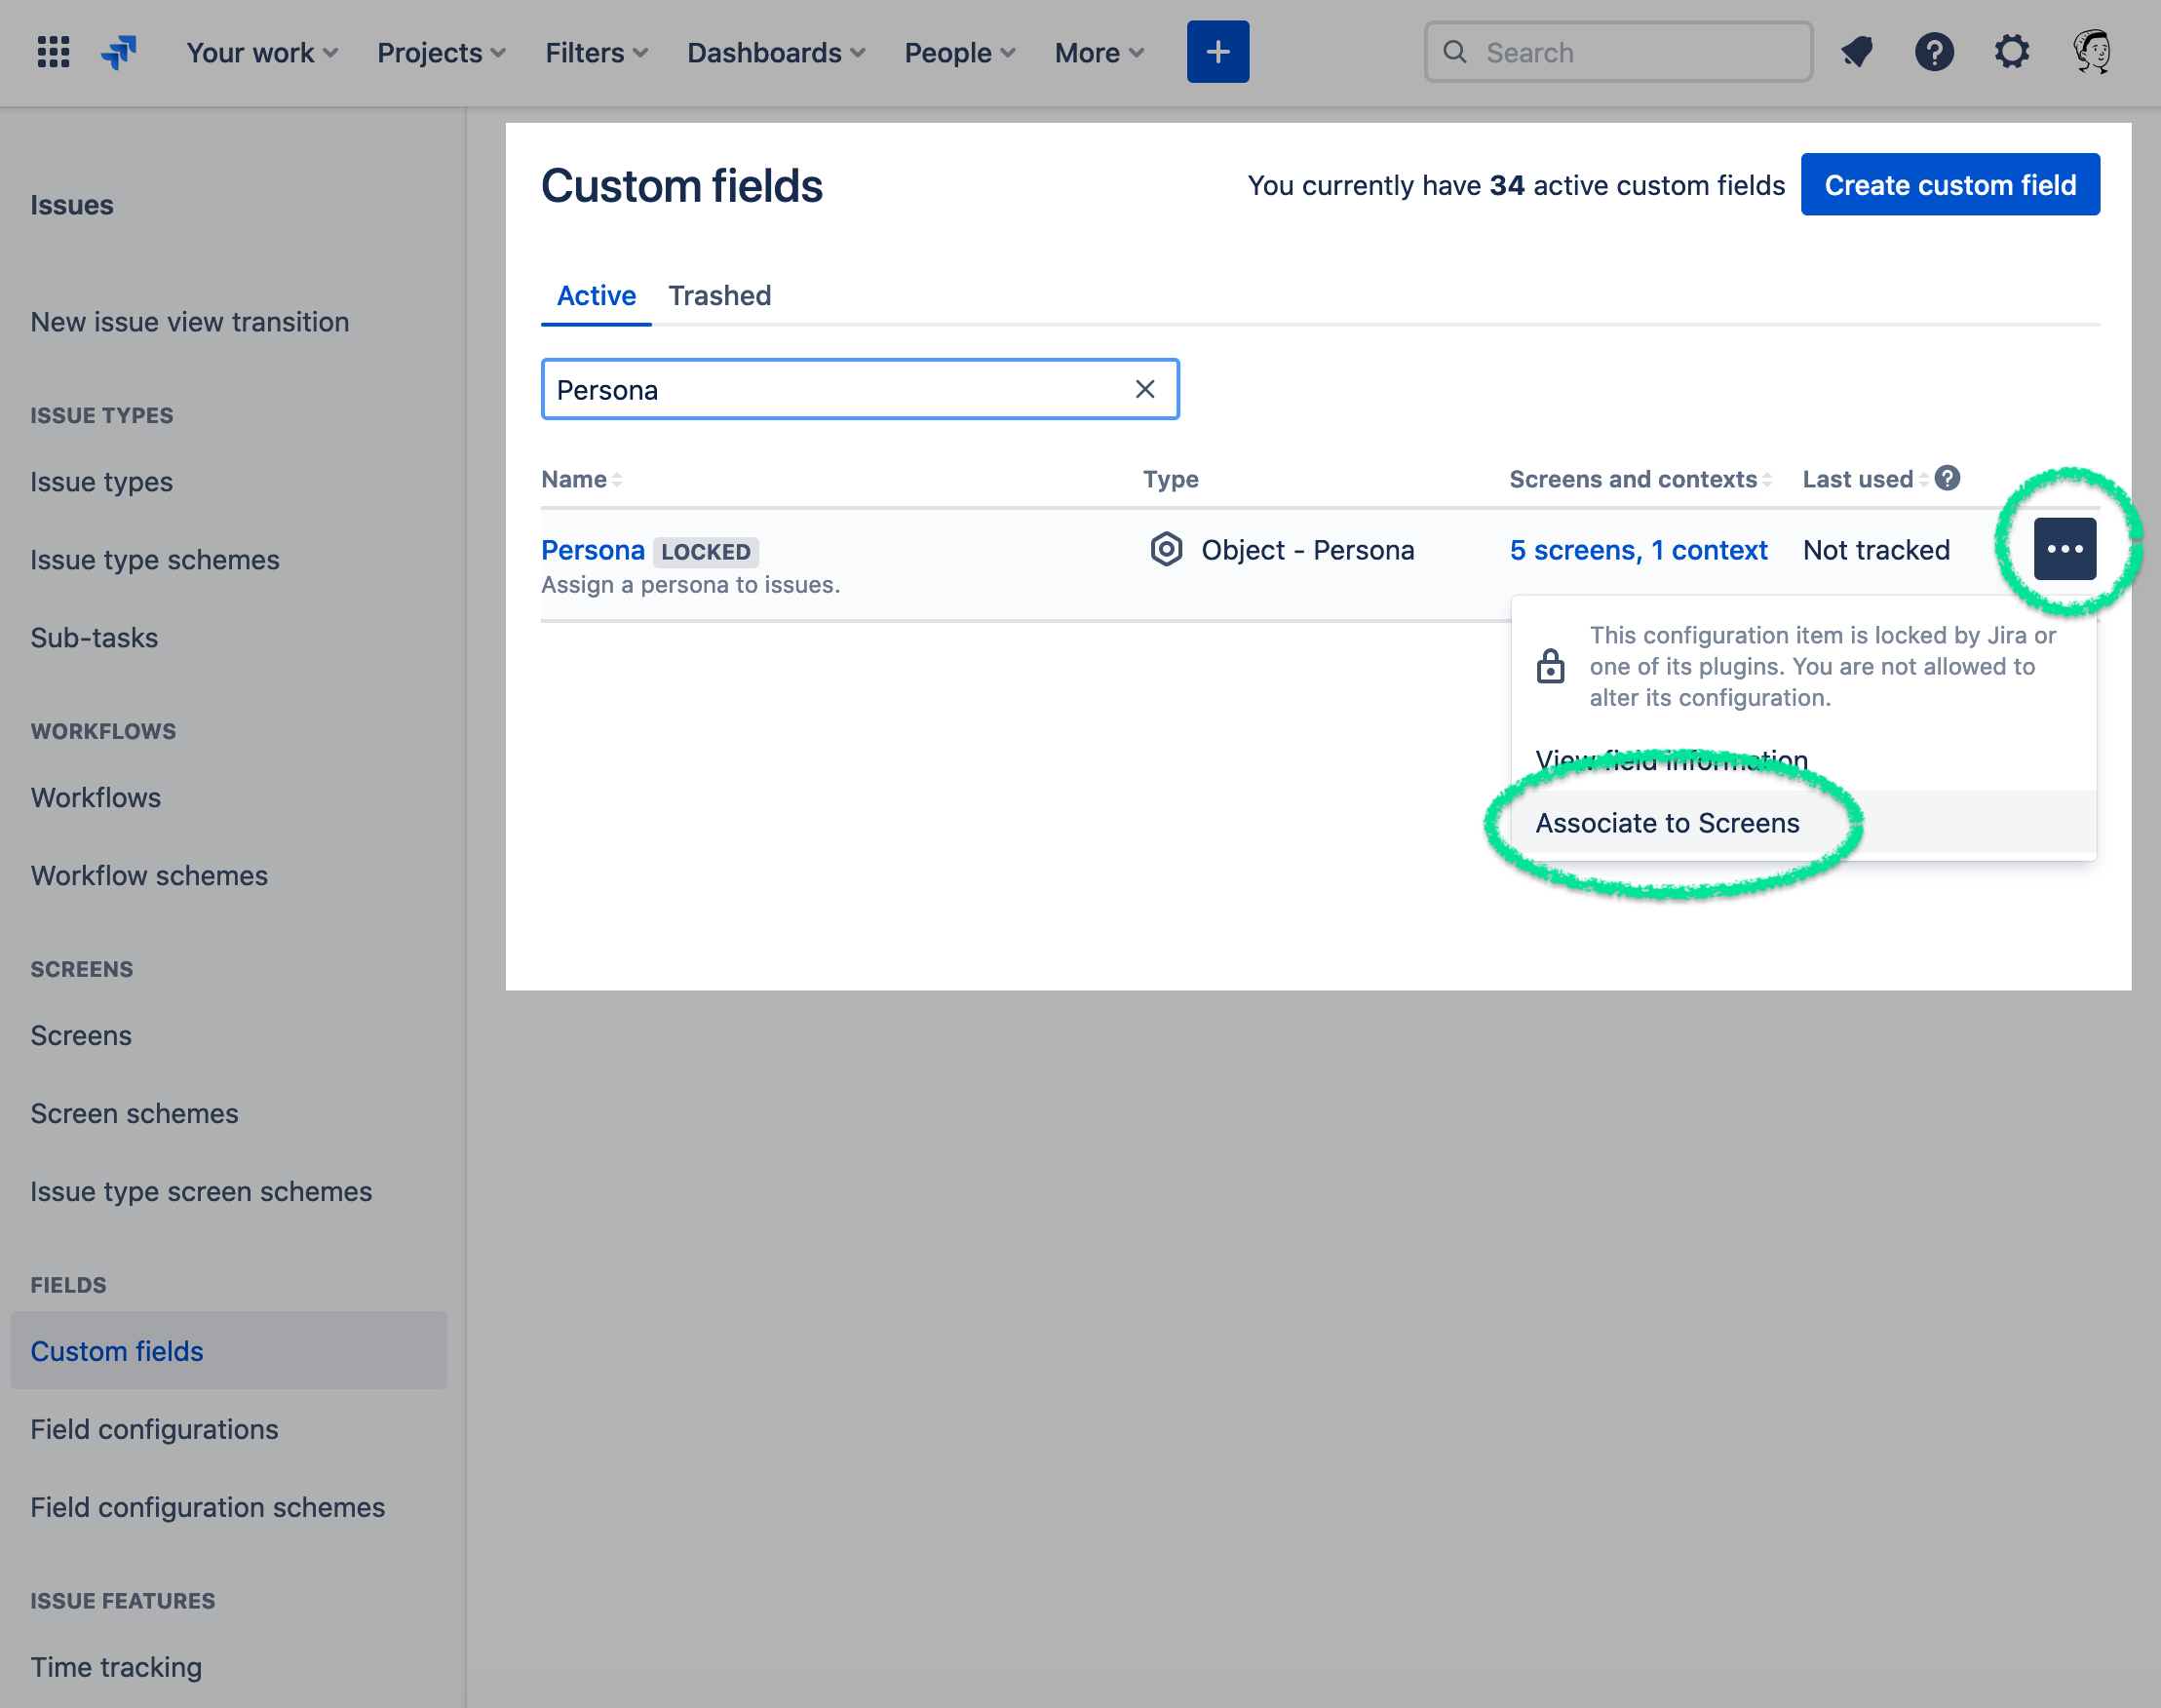
- Click on the three dots on the right and choose “Associate to Screens”
- Select the screens that you want to display the custom field on and click Update.
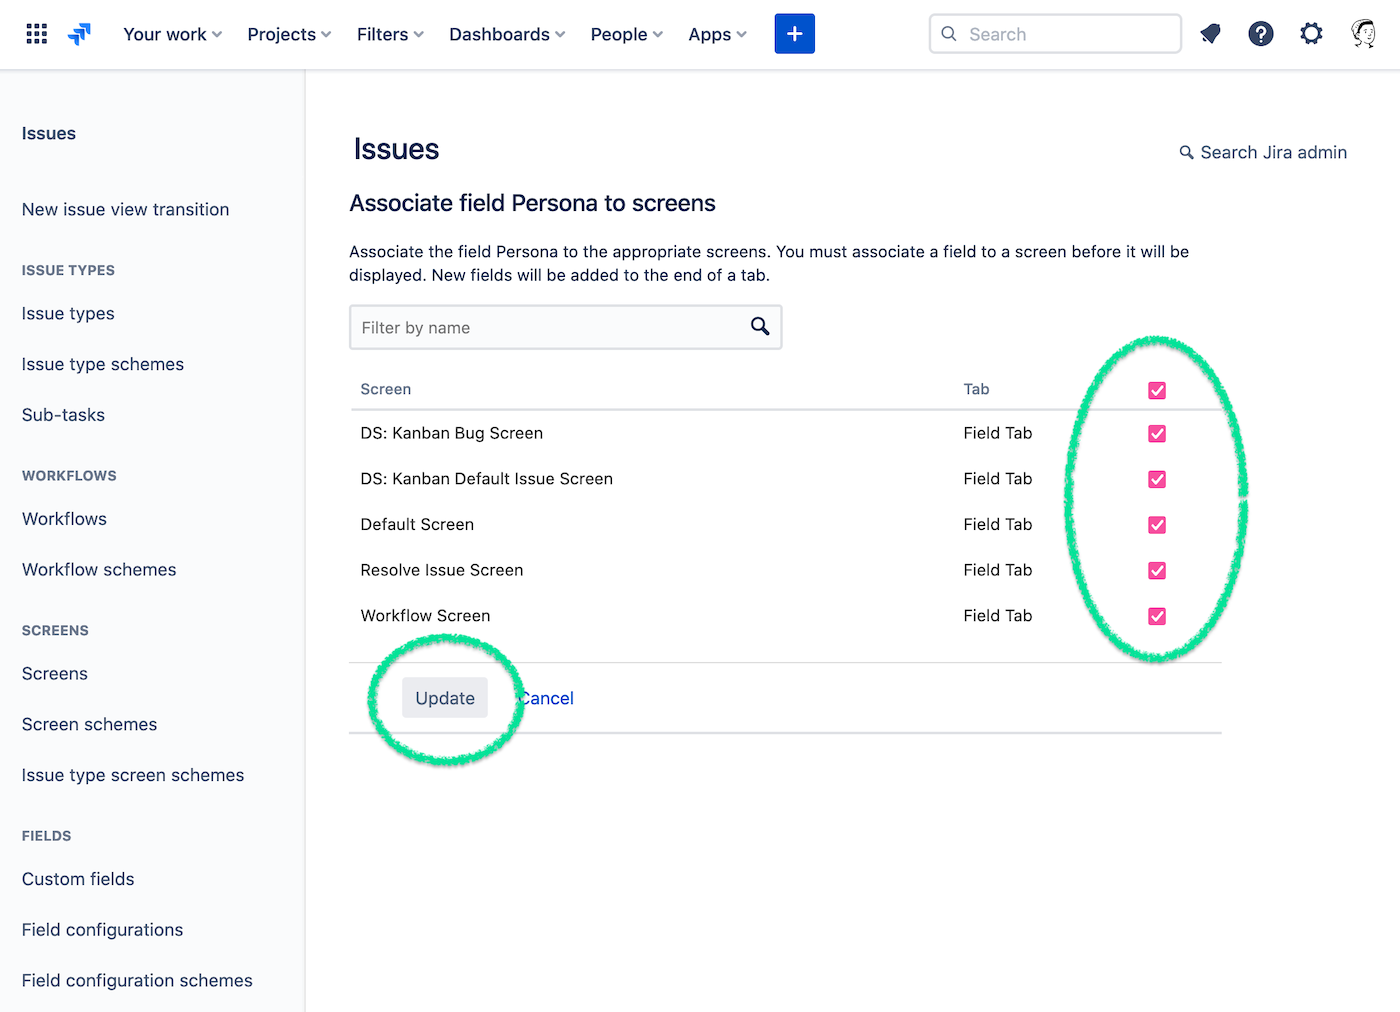
🎉 That’s it! You are now ready to customize your first persona!